Hope Reflected

Encouragement and Hope from God's Word

Hope’s How-To Archive

Tuesday

19

September 2017

Hope’s How-To | Dry Lay Stone Border

Written by , Posted in Gardening, Hope's How-To

Several of you have asked why we haven’t shared any photos of what we’ve been working on in our garden and yard so far this year. Well, friends, it’s been a full summer! Wes and I have both commented to each other several times that we feel that we’ve hardly had any time to be at home this summer and just… be. Anyone else with us?!

How to build a stone border | See our latest garden stone border at hopereflected.com

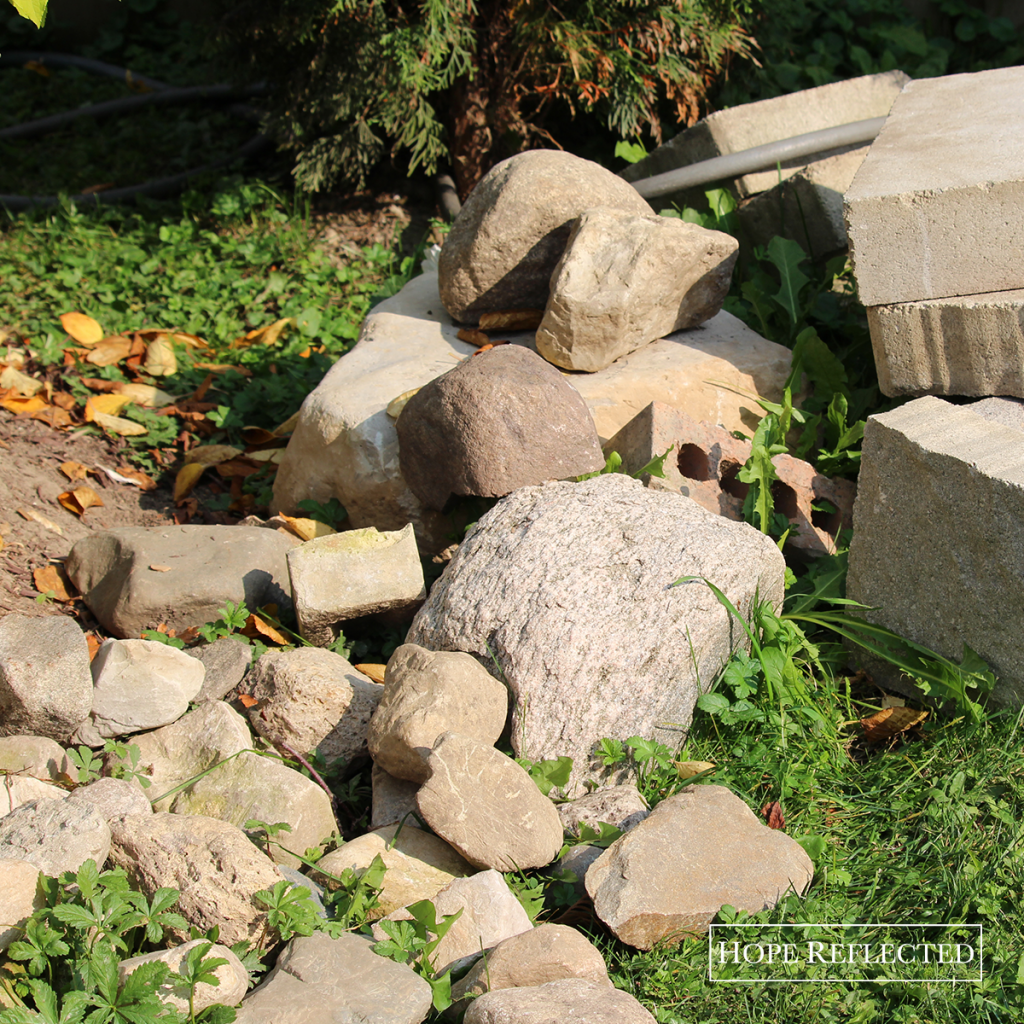
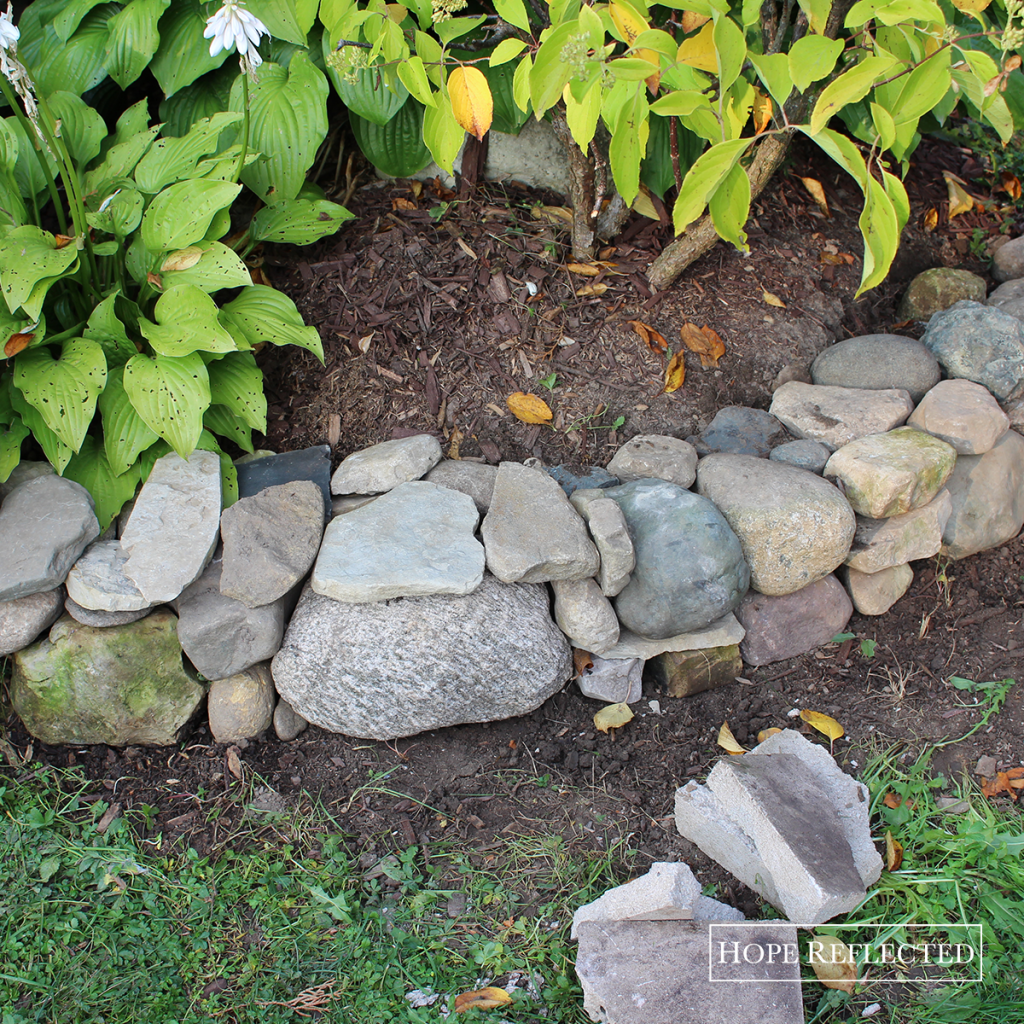
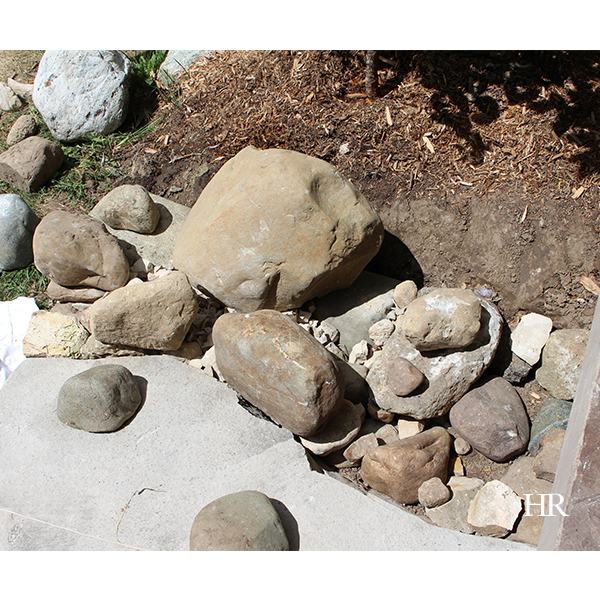
This past weekend, we were able to enjoy a brief respite from the world and spend some time outside in the garden and yard. Wes was able to get started on the next stone border in our garden, and I must say, it’s looking so beautiful I just had to share some pictures. Check out the “before” photo below.

Our latest garden stone border is on the blog! | See more at hopereflected.com

If you’ve been following along with our blog, you’ve already seen photos of the garden stone border that Wes completed last summer. Well, this summer, between concentrating on our hedge and planting more cedars, we’ve had little time to dedicate to finishing the dry lay stone border on the south side of our garden.

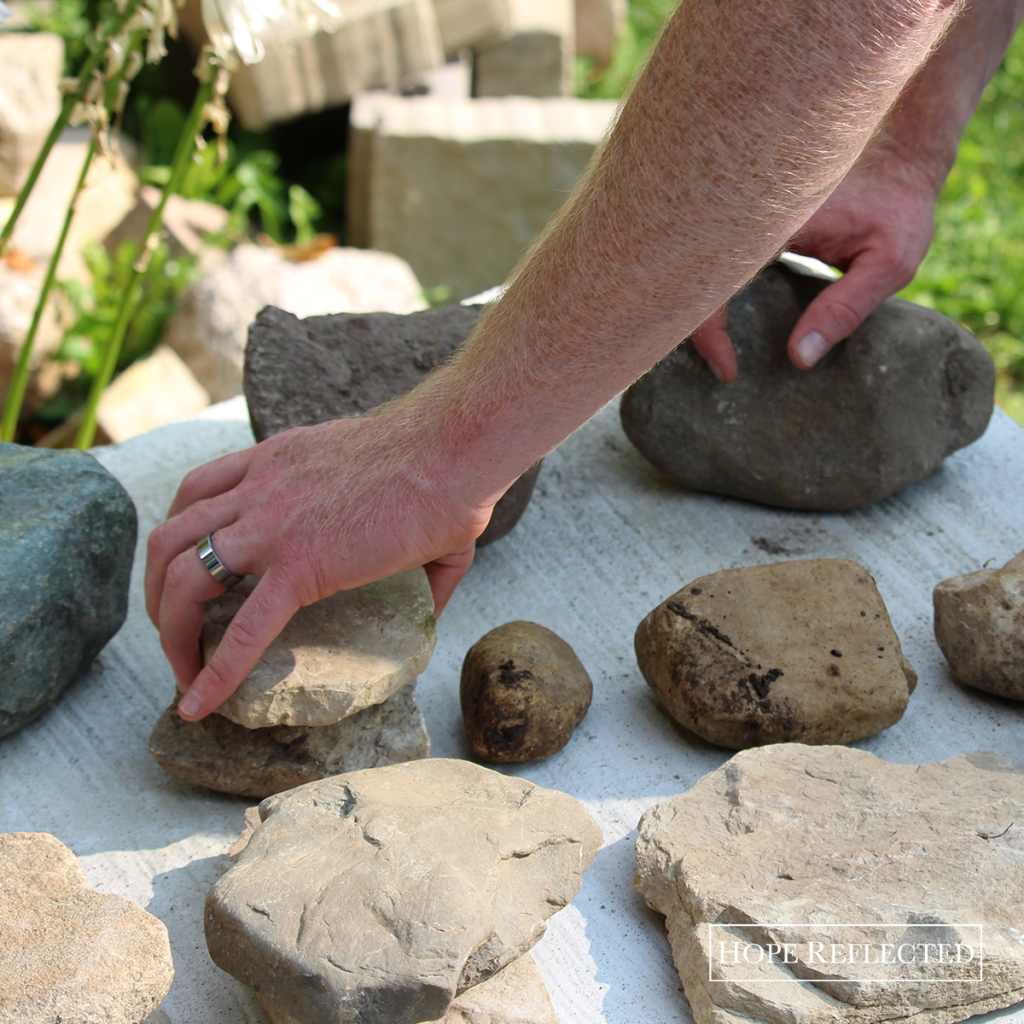
This past weekend, Wes went to work sorting stones and carving out the foundation for our latest dry lay stone border around the garden.

Our latest garden stone border is on the blog! | See more at hopereflected.com

Our latest garden stone border is on the blog! | See more at hopereflected.com

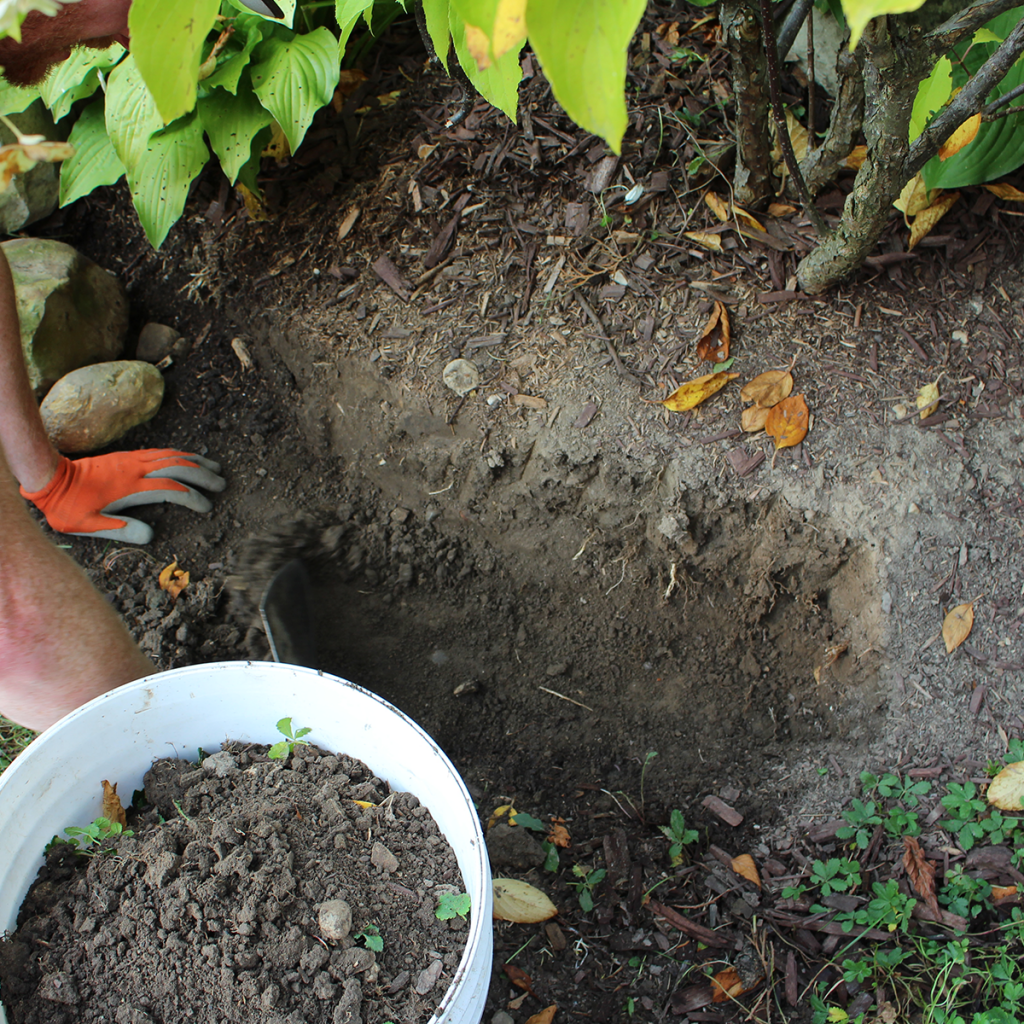
Wes started by cutting back the dirt bank about 10 inches to accommodate for the dry lay stone border. He dug out at an angle so there was positive slope towards the flower bed, which ensures that the stone actually sits into the bed rather than leaning out from the flower bed.

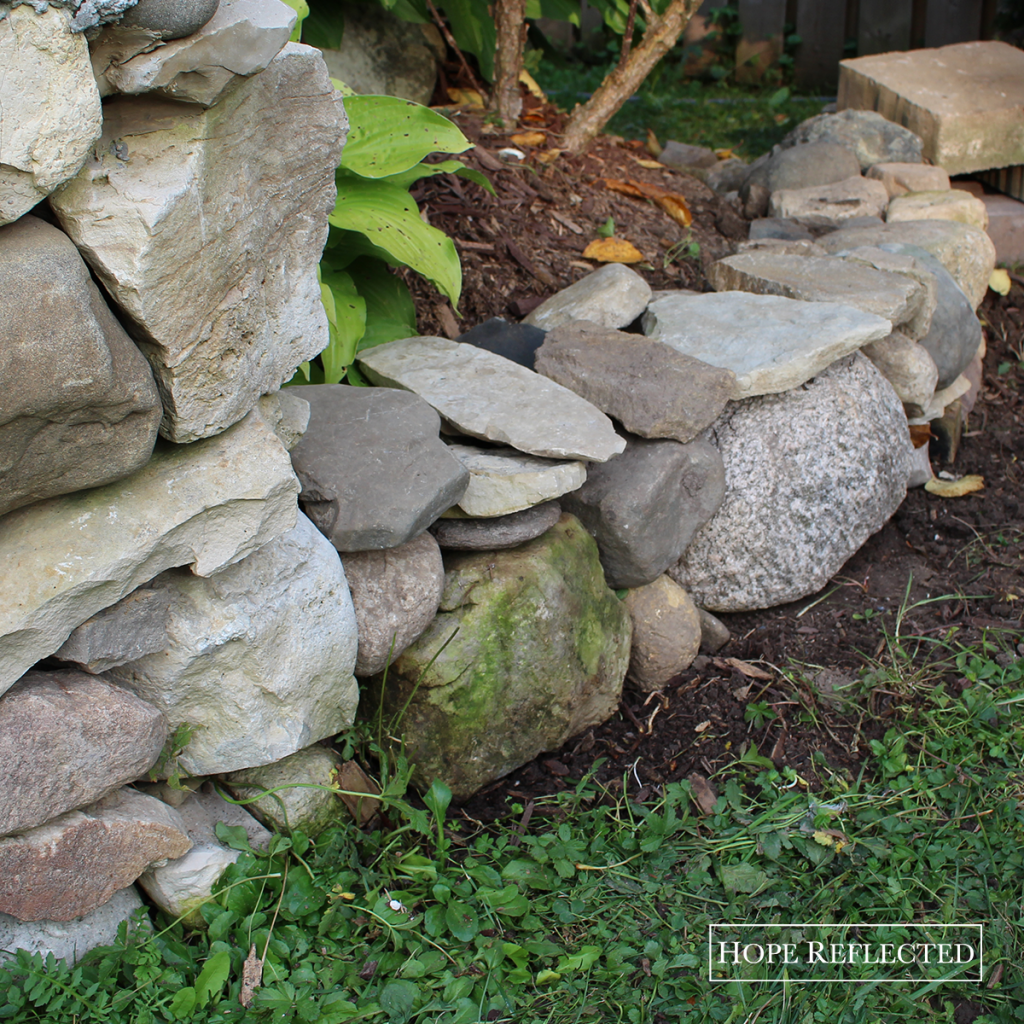
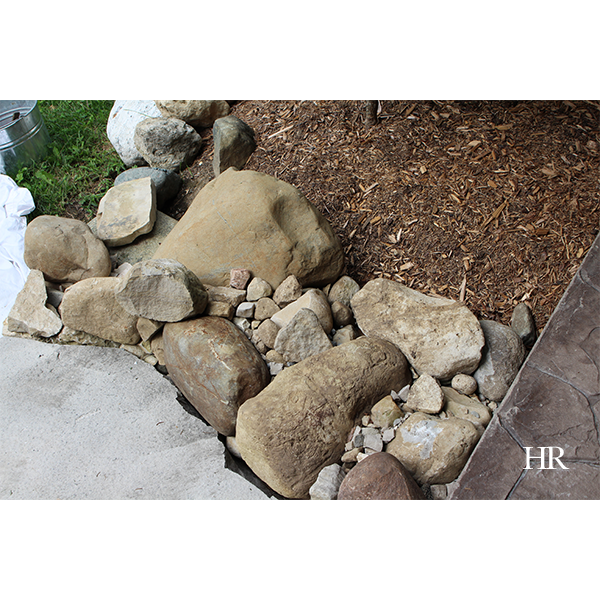
He placed the larger stones after taking a full inventory of the stones he had to work with (see photo above), and went to great lengths to place them evenly throughout the border wall. There was definitely some trial and error involved with creating the dry lay stone border. As Wes noted, the nice thing about this kind of application is that it does not have to be permanent; stones can be adjusted and moved if you get looking at them and feel you don’t that you don’t like the placement. In fact, areas can be entirely dismantled and reassembled to your liking. That’s the beauty of creating a dry lay stone bench or stone border for your garden! Wes says to think of the stones that you already have in your possession as pieces to your puzzle. There will be stones that sit better together; you just have to take the time to find them and to make the pieces work.

Our latest garden stone border. | See more at hopereflected.com

Our latest garden stone border. | See more at hopereflected.com

For us, this latest garden stone border project already makes a beautiful addition to our yard. Our latest border helps balance out the rest of the border around the garden. I love how Wes placed some of the larger stones evenly throughout the first level, and how he was so careful with the colour placement of the stones as well. I can’t wait to see the finished product!

Check out more photos of our DIY stone projects, stone garden benches, and stone borders and let us know what you think!


Tuesday

27

September 2016

Hope’s How-To: Build a Dry Lay Stone Bench, Part 2

Written by , Posted in Gardening, Hope's How-To

Hope's how-to: Build your own dry lay stone bench

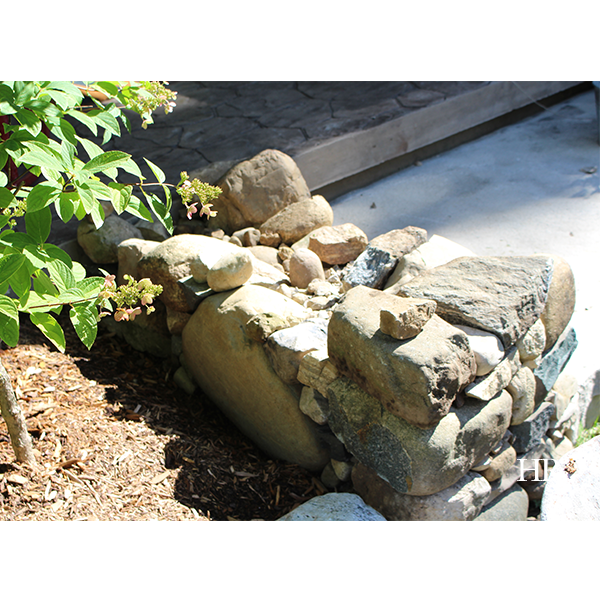
As you’ve read previously, Wes has completed two dry lay stone bench projects in our yard. In August, he started working on a third, just off our patio, and we’re finally getting around to posting more photos of the whole process. The photo above shows the dry lay bench when the yard-facing end was complete. Wes notes that if you’re building your own dry lay stone bench, it’s important to consider that each layer of the bench should be completed at the same time for structural strength.

dry lay stone bench

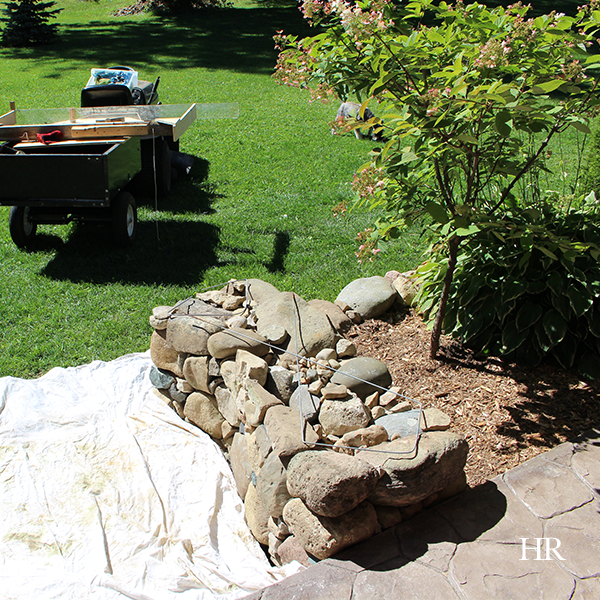
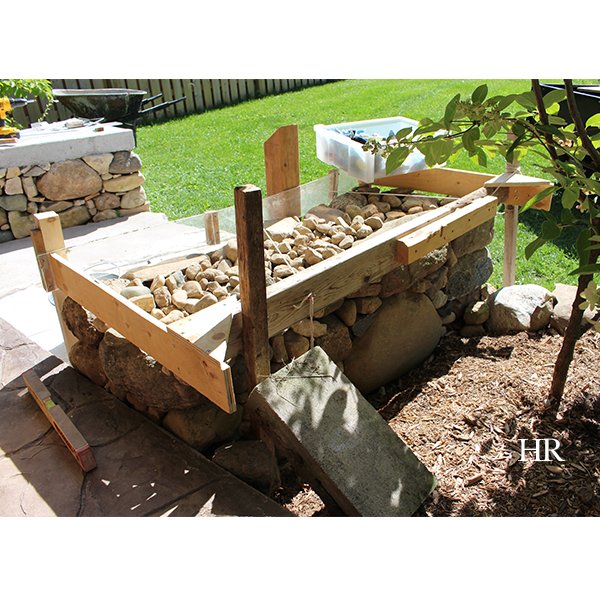
This is a photo from our patio vantage point, looking at the completed dry lay bench, just before Wes poured the concrete cap. Wes was very careful to maintain the angle of the bench, taking into consideration which way we want the water to run off the bench (away from our home and patio). During the building of the bench and pouring of the concrete cap, our patio stone was covered to prevent any staining or damage.

dry lay stone bench

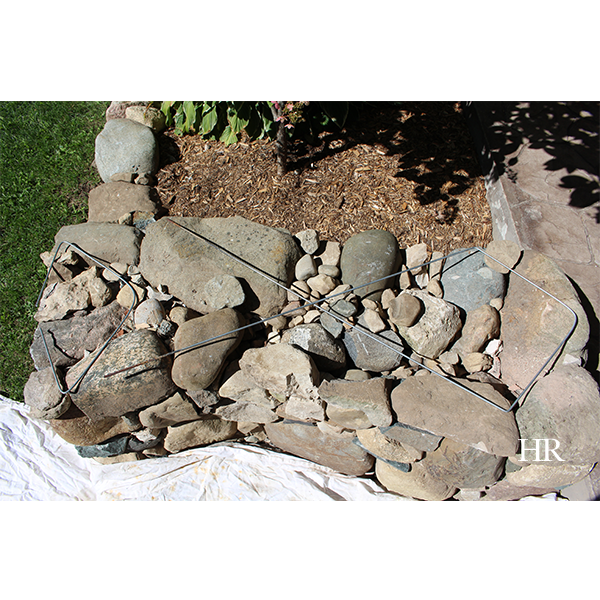
In preparation for pouring the concrete cap, Wes utilized some old wire from a sign in substitution for rebar and to reinforce the strength of the concrete cap. We debated whether we actually wanted to pour a cap on this bench, or just leave it as an entirely natural lay, and in the end we opted to pour a cap for a couple of reasons: 1. So the look of our patio would be symmetrical, and 2. A poured concrete cap = extra outdoor seating for entertaining in the summer months!
dry lay stone bench with form

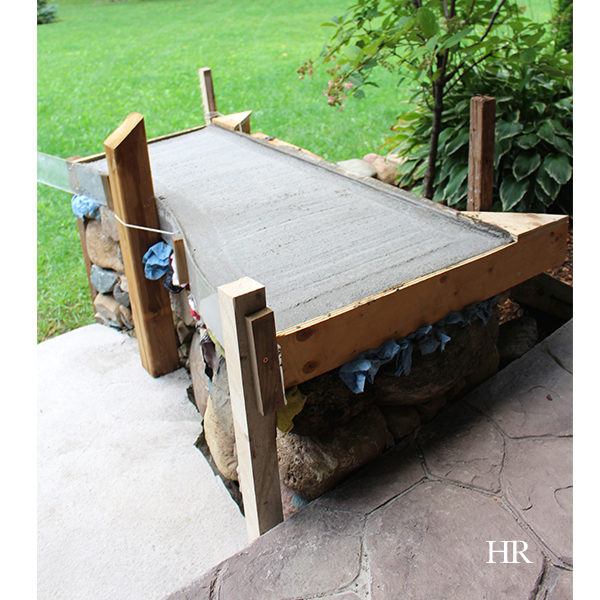
It required a lot of patience to build the form for the concrete. Wes ensured the run off angles were accurate by using a level every step of the way. He also used string to pull in the plexiglass side of the form to create the curved side of the concrete cap. He made several adjustments along the way as setting up the form was tedious work.

dry lay stone bench

As you can see from the photo above, Wes used plexiglass for the one side of the form as we wanted to create a curved side that runs parallel with the natural shape of our patio stone. If you’re planning a project like this on your own property, we’d recommend ensuring that for your concrete cap you use the right ratio of water to cement. Add the water slowly to your mix. After the concrete cap was poured, Wes used a broom to create the brushed effect in the centre of the concrete, and used an edger to create the finished border.

Stay tuned for more pics of the finished product and our patio!


Tuesday

30

August 2016

Hope’s How-To: Build a Dry Lay Stone Bench

Written by , Posted in Gardening, Hope's How-To

We’ve had several compliments and questions regarding Wes’s masonry style when it comes to the dry lay stone benches he has been creating in our yard. He’s working on the third bench now to round out the project, and I can’t wait until it’s complete!

dry lay stone bench before

The above photo is before things really got started on the dry lay stone bench. Previously, we had a pile of large stones between the garden and slab stone step off our patio. To get the ground ready, Wes raked and levelled out the earth, and put down some gravel.

dry lay stone bench after

If you’re looking to create a DIY dry lay stone bench of your own, you will want to choose the stones for your bench based on their function in the wall system. In the above photo, you can see how Wes has carefully selected larger anchor stones for around the border of the stone bench, and used smaller, filler stones for the centre of the bench.

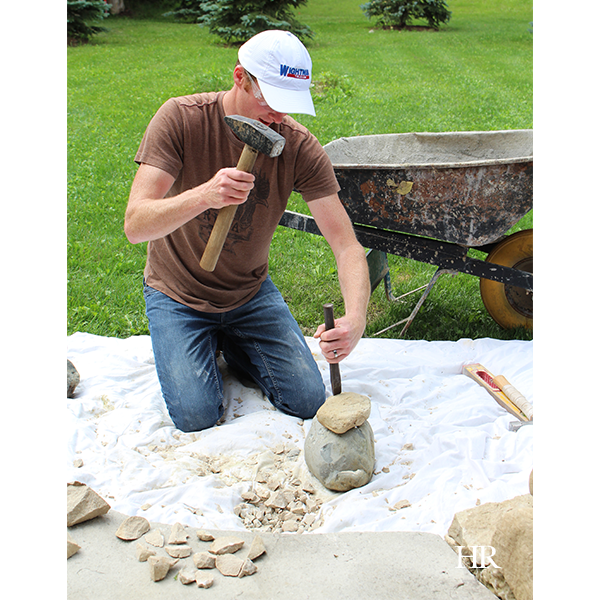
my husband cutting stones

Choose a stone according to its density. For example, if your DIY bench requires custom stone cutting, ala the photo above, you’ll want to choose limestone to work with it because it cuts more easily than other rock varieties. As you can see above, Wes is cutting a piece of limestone against a blue metamorphic rock (which is extremely dense and does not break easily).

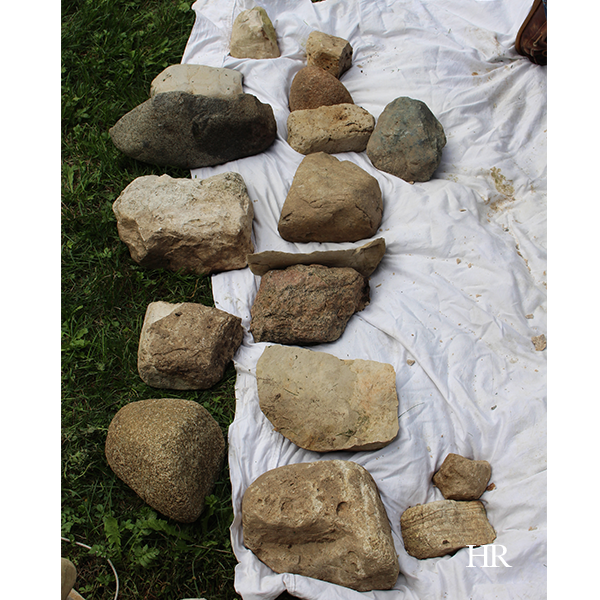
choose rocks for your stone bench

Wes highly recommends laying stones out so you can see them before you get started with your stone bench project. Having a full view of the rocks available for your DIY will greatly assist you as you compose your stone bench. This practice also allows greater ease in experimenting with which stones will work best for the space in which you’re building.

For more advice and photos on how to build your own dry lay stone bench, check out our other completed DIY stone bench projects here, here, and here.

Friday

17

June 2016

Hope’s How-To: Build a Robin’s Nest – Part 4 – Robin Fledglings

Written by , Posted in Christian Living, Gardening, Hope's How-To

robin fledgling 1

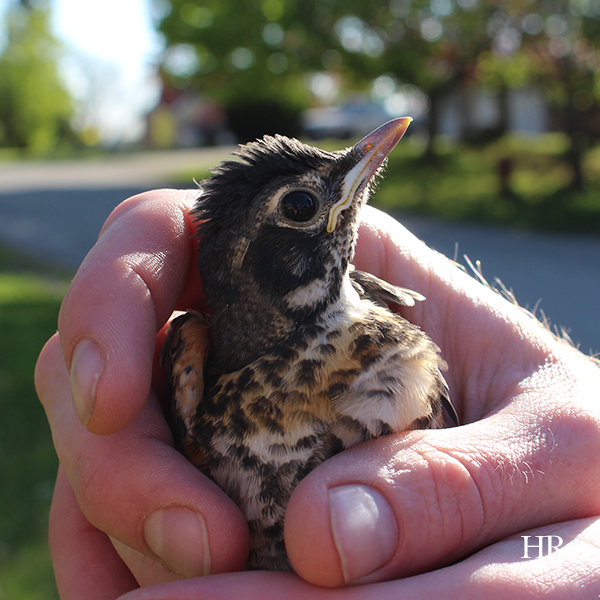
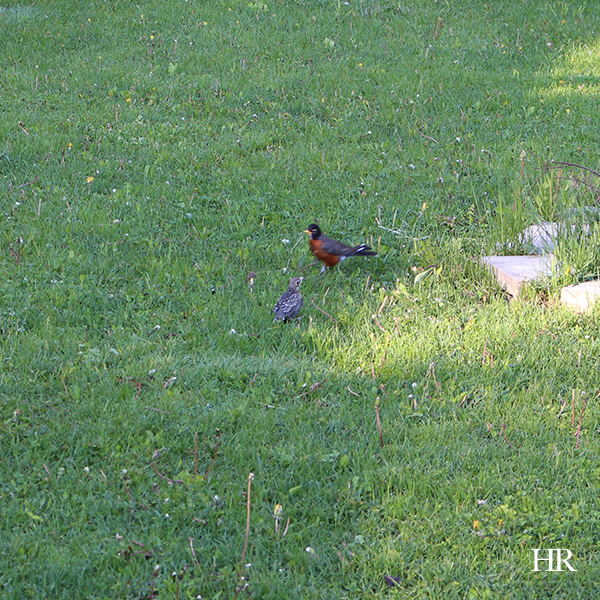
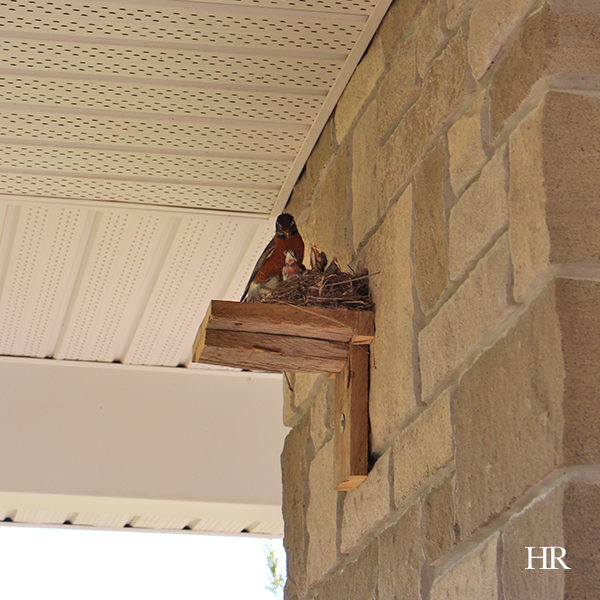
This happened several weeks ago, however lately our lives have been in a constant state of motion, so I’ve not had time to post a robin update until now. The baby robins flew the coup (quite literally)! All four of our baby robin fledglings have left the nest and set out on their journey through… our yard.

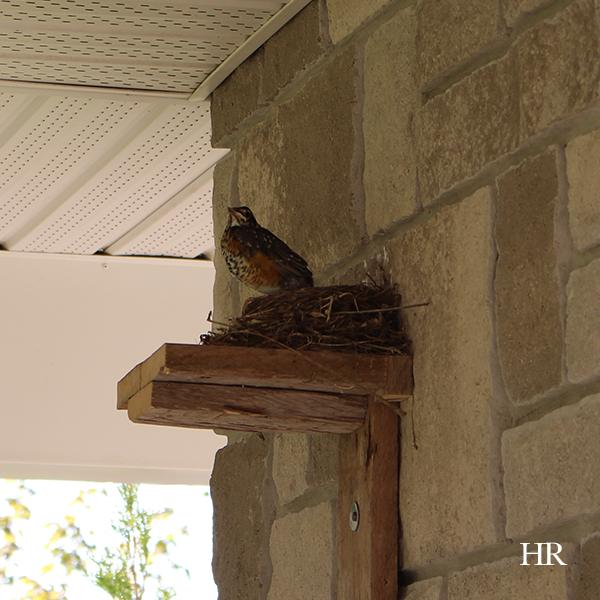
baby robin fledgling in nest

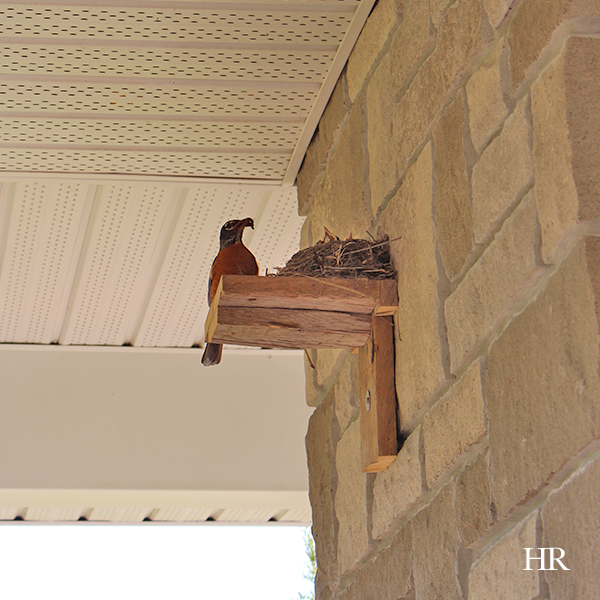
Wes and I came home from church a few weeks ago, and I wanted to check on the baby robin fledglings in the nest. As the robins had been living right on our patio by our living area, it was easy to sit out and observe their growth, feedings,  and daily habits. Wes had encouraged me since the robin eggs hatched to keep my distance, and of course this particular Sunday in May I just had to get out there to see them.

Obviously the little guys were developed to the point that they were actually crowding the nest, however when I came out to see them, without being too close, they all fledged from the nest.

At first, I panicked. Wes ran around the yard and rounded them up to put back in the nest (see photo above), however it was clear; the baby robin fledglings were ready to embark on their adventure away from the nest.

baby robin fledglings

Over the past few weeks, a common sight in our yard has been Mama Robin bouncing and flying around the yard, with her young not far behind. While the robin fledglings have grown so much since the time of these photos almost a month ago, what remains of the family still calls our yard and trees home.

Unfortunately, we did lose one of the three robin fledglings — we aren’t sure if a cat got the robin, or the cold — however, three of the young survived (to our knowledge).

baby robin fledglings

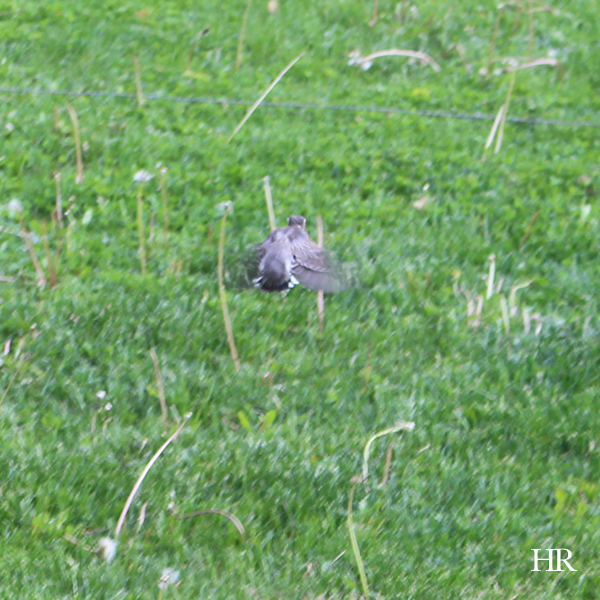
While many of our friends and family still have robin fledglings in the nest, our robins have flown the coup! Before they were developed, it was so funny to watch them try to take flight with small wings and no tail. Clearly they’ve grown in the last few weeks, and we’ll try to capture more photos as we go.

Watching the baby robin fledglings in our yard has certainly been an education; when they’re young, robins are defenceless. They’re yet to learn how to fly (we were blessed enough to watch them practice in our yard), they’re dependant on their parents (Dad brings the young to the robin roost at night, while Mama Robin feeds the fledglings by day), and they’re testing their vocal chords (hearing robin fledglings start to exercise their vocal chords is one of the most adorable sounds).

Hint to those who’ve built a robin’s nesting shelf: When your first “family” leaves the nest, be sure to dispose of the robin’s nest, clean and spray off the area. Once abandoned for their real world adventure, robins don’t return to the nest where they were birthed. The old nest can attract lice and mites, so it’s best practice to dispose of it once the robins leave the nest for good.


Tuesday

31

May 2016

Hope Reflected: 3 Facts About Patience

Written by , Posted in Christian Living, Hope's How-To, Published Work

3 facts about patience

When I told Wes that I was writing this week on the subject of patience he lovingly replied, “Did you say impatience?” I think he meant it jokingly, but the fact that he kept chuckling about it after he said it makes me wonder….

This column about patience was partially inspired by our weekly drive to church on Sunday mornings. Without fail, Wes and I always witness drivers, – evidently in a rush, – headed somewhere, speeding like bats of you-know-where, passing every vehicle in their path. Now, I’d be lying if I said I never speed or never pass, but the irony is when we witness this on a Sunday (especially if the driver speeding and passing is headed to church) or if we end up right behind said driver at the next set of lights. Today on the road was no different; there was someone out there speeding, but today, the driver passing got pulled over. Which begs the question, why the rush?

Well, it’s easy to get caught up in the rush of the everyday. Who can blame people? Information is available instantly through the Internet, large purchases can be put on credit, and there’s a drive through for just about anything you can think of. In a world like we live in today, who needs patience?

Patience is definitely an under-rated virtue in today’s fast-paced world, but that doesn’t mean it’s not important. Leo Tolstoy once said, “The most powerful warriors are patience and time,” and he was right. While it’s often easier to take the quick road out, planting a seed and watching it grow – whether you’re buying a new home, pursuing a career, or even looking for love – requires both patience and time.

So what does the Bible say regarding the topic of patience? Here are 3 requirements of patience that God’s Word teaches us:

  1. Patience requires us to rest. “Rest in the LORD, and wait patiently for him:” (Psalm 37:7) It’s ironic, isn’t it, that when we’re waiting for something, we often feel anxious or restless, but then the Bible instructs us to do the exact opposite, so there must be a reason, right? To put in context, David wrote Psalm 37 later in life, and if you know about David’s life, you know he had plenty of occasions to learn how to properly practice the virtue of patience. David knew what he was talking about when he instructed readers to “rest in the LORD.”
  2. Patience requires us to establish our hearts. “You also be patient. Establish your hearts, for the coming of the Lord is at hand.” (James 5:8) In verse 7, James instructs readers to be patient like the farmer who waits for the fruits of the earth. Farmers have some of the most stressful careers out there, which we all depend on! By definition, the word establish means to “set up on a firm or a permanent basis.” We all need a firm foundation, and the most important place is in our heart. If you don’t know Who you believe in, or what you stand for, you’re in for a bumpy ride. Patience requires us to examine our hearts, and further establish our Faith.
  3. Patience requires us to be humble. “Be completely humble and gentle; be patient, bearing with one another in love.” (Ephesians 4:2) Exercising patience, true patience, means that some of the following characteristics are going to be brought out in us: Humbleness, gentleness, meekness, forgiveness. You can’t be patient without exercising the aforementioned characteristics. True patience helps us become more like Christ.

It may not always be easy – in fact, sometimes exercising patience will be the hardest thing, — but practicing patience is worth the wait (quite literally). If you’re feeling discouraged or like you can’t go on, take heart! As missionary Elisabeth Elliot famously said, “Don’t dig up in doubt what you planted in faith.” Patience can be accomplished, one day at a time.


Originally published “3 Facts About Patience.” Minto Express. May 18, 2016: 5. Print.

Thursday

19

May 2016

Hope’s How-To: Build a Robin’s Nest – Part 3 – Baby Robins Are Here

Written by , Posted in Christian Living, Gardening, Hope's How-To

mama robin feeding baby robins

They’re here!

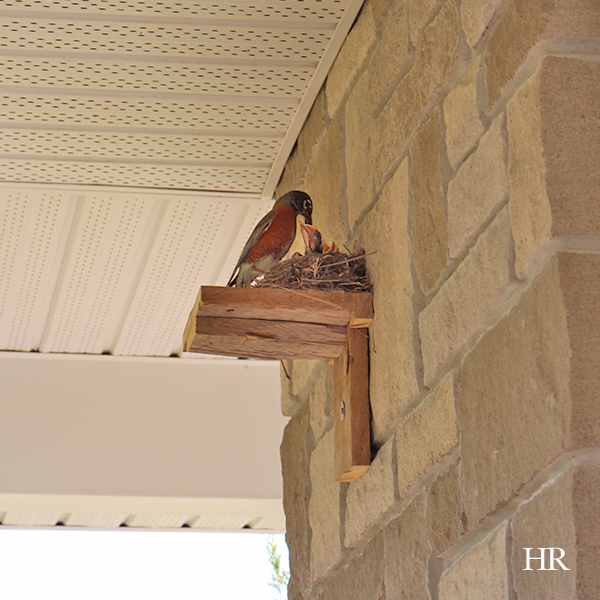
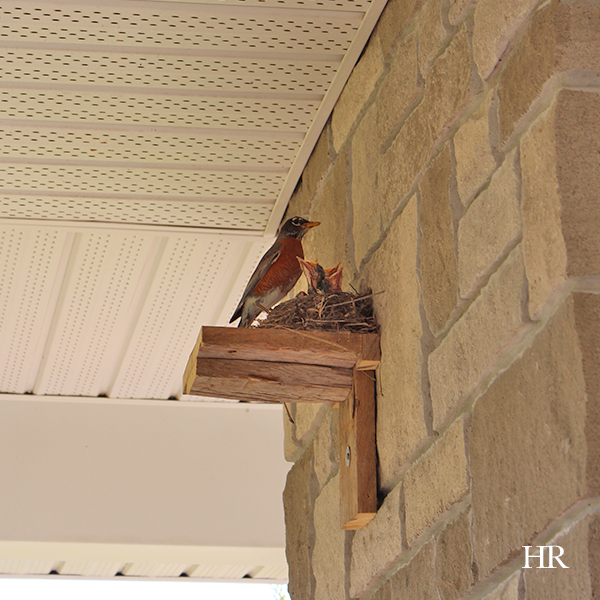
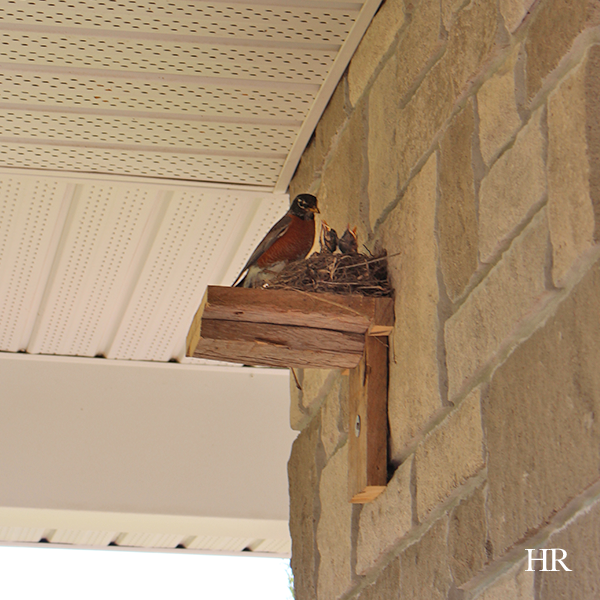
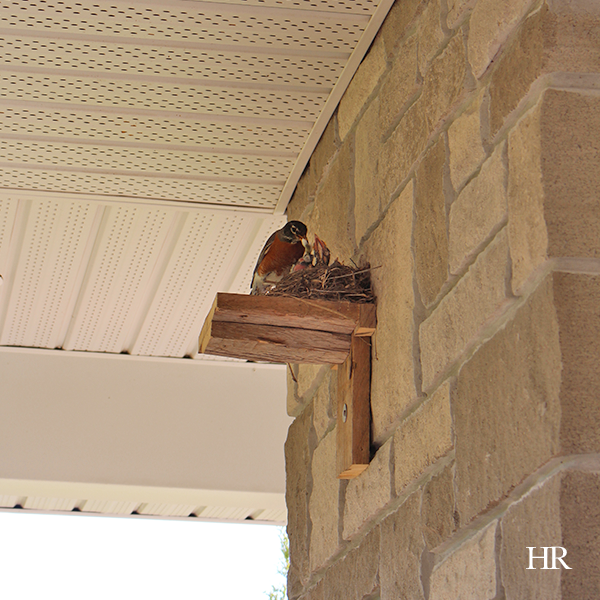
While Wes and I were away, looks like Mama Robin had plenty of time to sit on her eggs! Four sweet baby robins have entered in to the world and are being raised on our patio. Wes has had to remind me several times to give the new family space—especially since the temperatures have been so cold—however today I was able to capture some photos of our tenants.

mama robin feeding baby robins

Mama and Papa Robin have pretty much taken over our property, and even pulling up the drive I can see them bouncing around on the lawn, giving me their most threatening glances. Fortunately, yesterday evening, I was able to get some photos of mama robin feeding her baby robins.

mama robin feeding baby robins

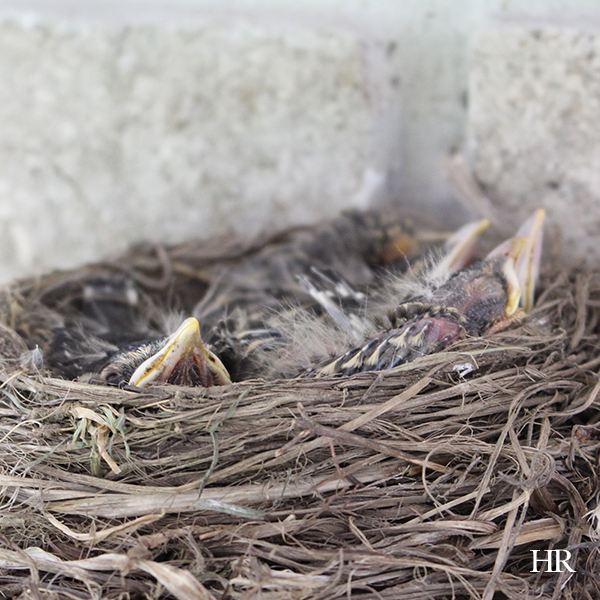
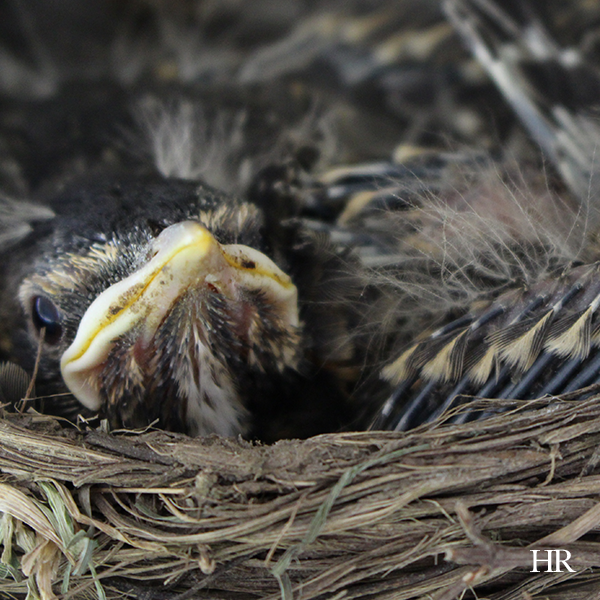
It is quite a phenomenon, watching robins feed their young. Robins are an altricial species, meaning that their young are hatched or born in an undeveloped state that requires care and feeding by the parents. Unlike chicks who hatch in a more mature state, baby robins aren’t the best looking birds of the bunch (although admittedly I do find them quite adorable).

mama robin feeding baby robins

Most baby robins have very few or no feathers, bulging eyes, and almost transparent skin. It is truly a miracle of creation to see these little birds up close, and also to observe the parent robins feeding their young.

mama robin feeding baby robins

Interestingly enough, robins start feeding at sunrise, and often Mama and Papa robins feed their young about every twenty minutes from sunrise to sunset. Their diet consists mostly of worms and berries.

mama robin feeding baby robins

Typically it takes baby robins two weeks (likely 9 to 16 days) to be fledged before they fly from the nest, and you can usually tell once baby robins are a week old as the parent robin(s) stop sleeping in the nest around that time.

mama robin feeding baby robins

Another important thing to remember about robins is that the parent robins go by sight and sound, not by smell. This means, that unlike other animals with young, if you discover a baby robin that has fallen from the nest, you can gently pick it up and place it back in the nest without the Mama and Papa robins abandoning the fledglings.

mama robin feeding baby robins

“Look at the birds of the air….” {Matthew 6:26}


Wednesday

27

April 2016

Hope’s How-To: Build A Robin’s Nest – Part 2 – The Robin’s Eggs

Written by , Posted in Christian Living, Gardening, Hope's How-To

robin's eggs

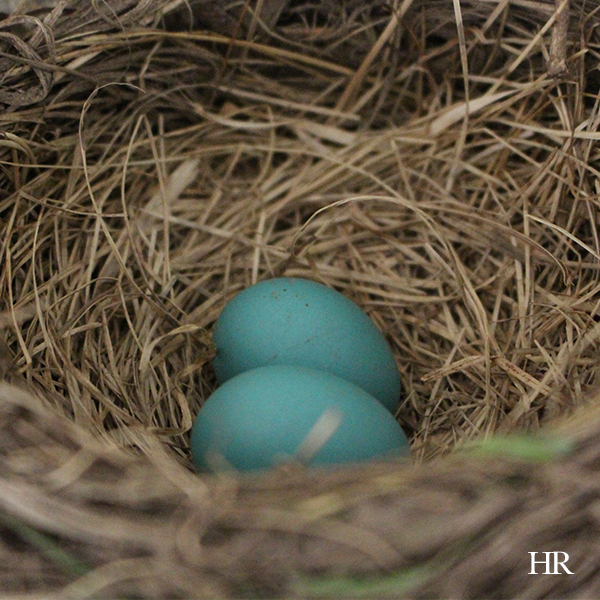
Robin’s nest update for you all: The robin has laid two — count it, TWO — eggs! Yes, that’s right! Robin’s eggs! Yesterday afternoon, I noted whilst driving away from the house that the mama robin was in the nest. Sure enough, last night when we checked, you can imagine my delight upon the discovery of two beautiful robin’s egg blue robin’s eggs.

My initial exclamation was something about how exciting this promise of new life is; Wes’s initial exclamation was about the future of the robin species. The robin deciding to lay her eggs is a beautiful example of a delicate, fragile new beginning, right on our porch. Whatever way you choose to look at it, we are  absolutely thrilled with the prospect of two baby robins starting their lives and learning the ropes from the comfort of our porch.

robin's egg - hope's how-to build a robin's shelf

We are being careful not to be disruptive while the mama robin incubates and raises her young [although I have to say in hindsight I wish we’d set up a time lapse camera to capture all the action; note to self for next year].

Here are some fascinating facts about robins and their eggs:

  1. The incubation period for a robin’s egg is 12 to 14 days.
  2. The female robin typically does the incubating, rarely leaving her eggs for more than 5 to 10 minutes at a time.
  3. After birth, baby robins spend an average of 9 to 16 days in the nest.

Stay tuned for more action as we keep an eye on the mama robin and her young. Anyone else have robins planting roots in their yard this year?

Monday

18

April 2016

Dry Lay Stone Bench, Part 1

Written by , Posted in Gardening, Hope's How-To

apr18_dryrubblelaystonewall2

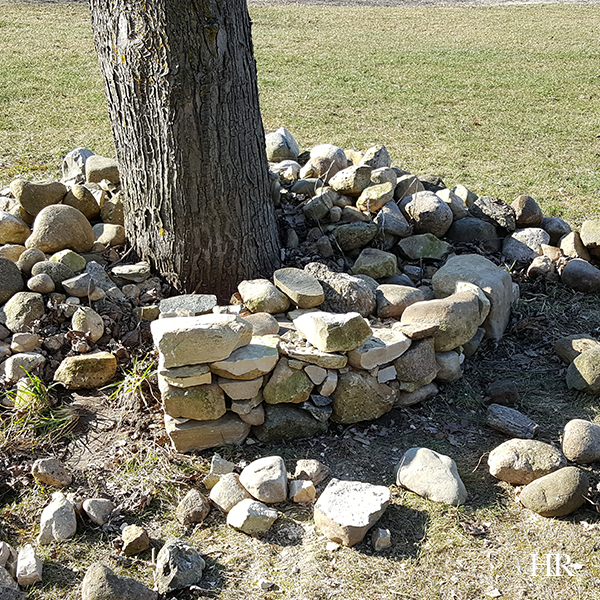
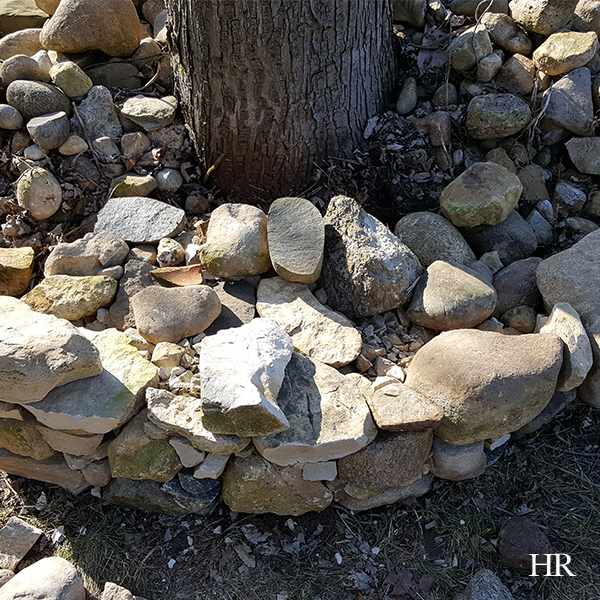
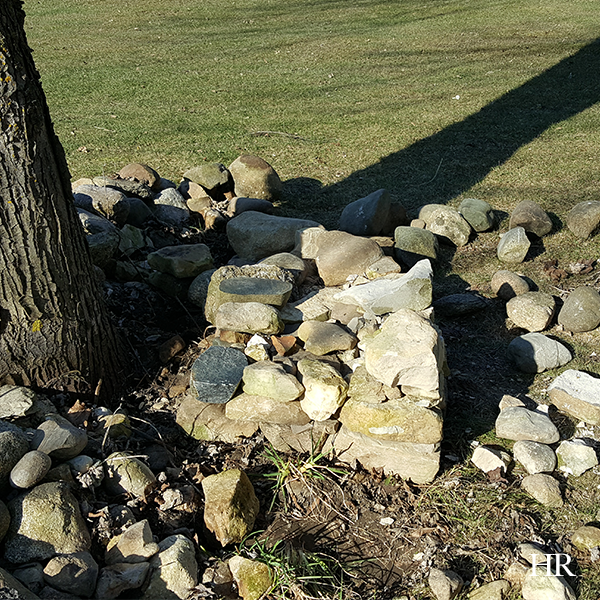
I’m pretty excited about the latest DIY project at our house: A stone bench. Being married to a master stone mason is a big blessing! This past weekend, Wes started to tackle the large stones we have surrounding one of the trees on our property. They were originally part of a tree well, and now these stones are being used to make a very attractive (and practical) dry lay stone bench (or two).

dry lay stone bench

On Saturday, Wes started the project, and began selecting and striking the stones. Eventually, his dry lay will form a bench, and he’ll pour a cap on the top to create the bench part.

Creating a dry lay formation of any kind — whether it’s a bench, a wall, or even a foundation — requires the mason or enthusiast to constantly keep a cool head and maintain a lot of patience.

This DIY dry lay stone bench project is in the very early stages, and I’ll post further updates as we move ahead. Wes’s plan right now is to create two benches, one that faces east, and one that faces west.

dry lay stone bench


Wednesday

6

April 2016

Hope’s How-To: Build a Robin’s Nesting Shelf

Written by , Posted in Hope's How-To

april6_hopereflected_robin2

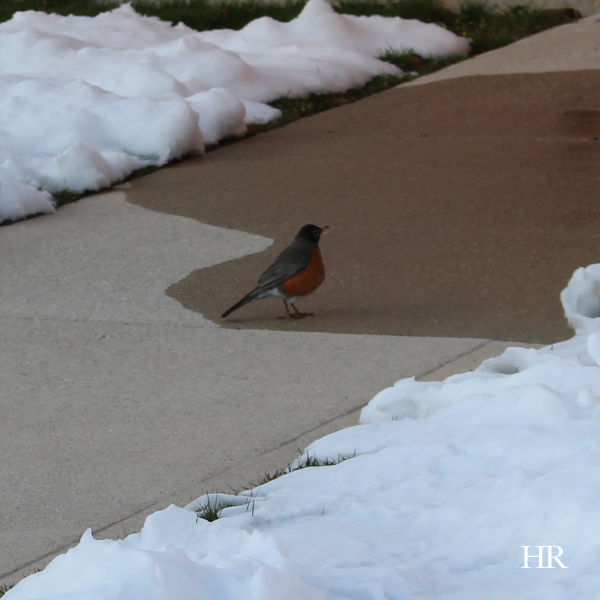
Spring is always an exciting time of year: The days are getting longer, the sun is shining brighter, and there are signs of new life everywhere. All this to say, we’ve had a less than stable Spring so far, what with fluctuating temperatures and seemingly endless snow. That’s got the returning robins scrambling, looking for a secure place to nest, and also foraging for food.

You’ve likely noticed the beautiful birds by the roadside or out on your lawn, looking for worms, berries, or other items to eat. They’re also deep into scouting season — looking for the best place to settle down, lay their eggs, and raise their young (for a full 13 days).

Being the compassionate person that I am, — save all the animals! — Wes agreed to build me a robin’s nesting shelf (or two!) to see if we could welcome a couple of new feathered friends to our home.

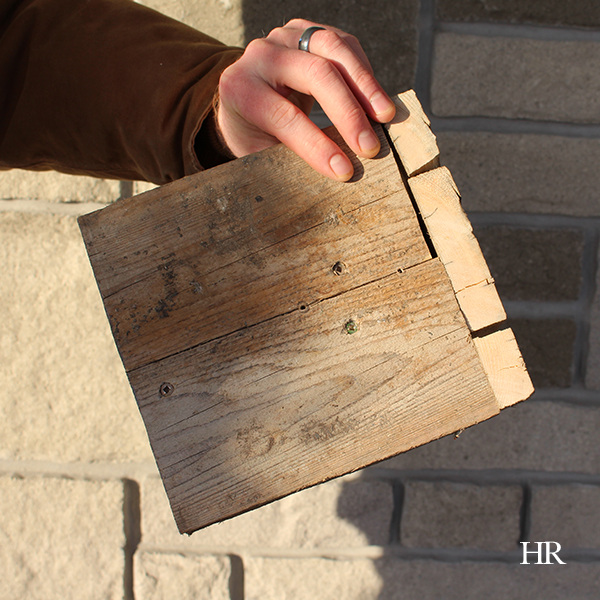
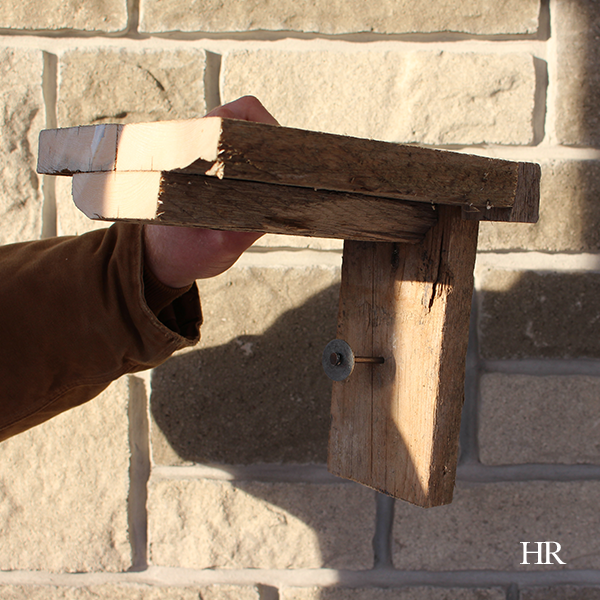
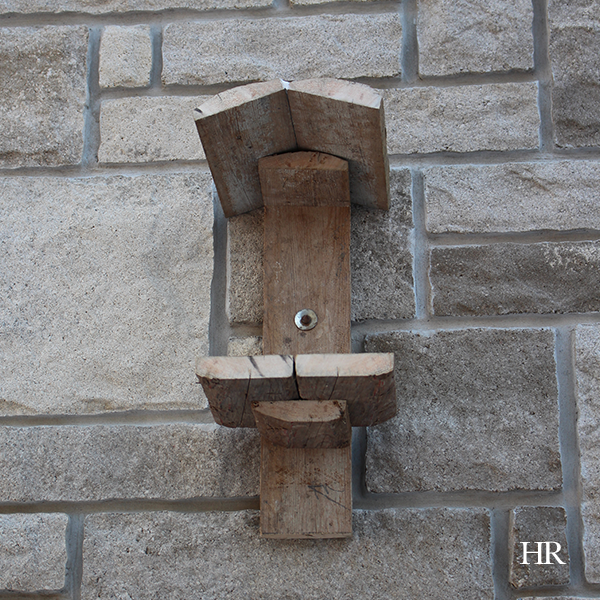
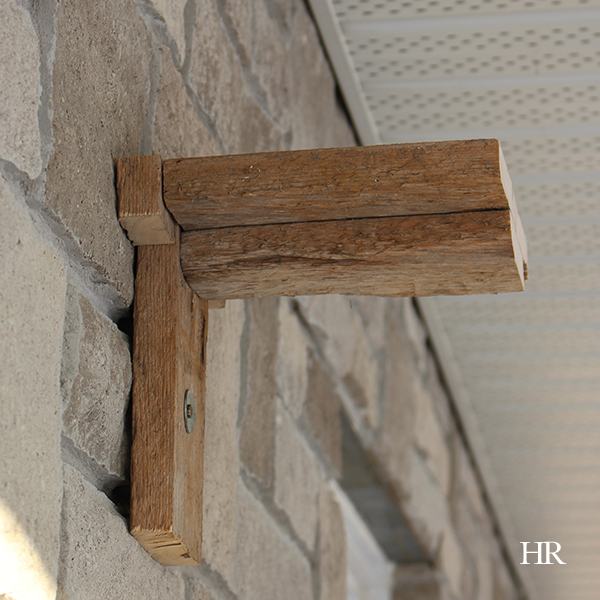
It doesn’t have to be complicated, in fact building a robin’s nesting shelf can be quite simple. You don’t have to use the best wood, and measurements don’t need to be exact. Just remember to include the fundamentals of a sturdy shelf made from non-pressure treated wood, a shelf approximately 8 inches squared (or something in that range), a height of at least 7 feet off the ground.

Here’s how Wes built ours:

  • For building my robin’s nesting shelves, Wes used 4-inch Spruce straps, non-pressure treated. You could use any other kind of wood, permitting it’s not pressure treated. Wes just used Spruce straps since we had them on hand.

april6_hopereflected_robin_nesting_shelf2

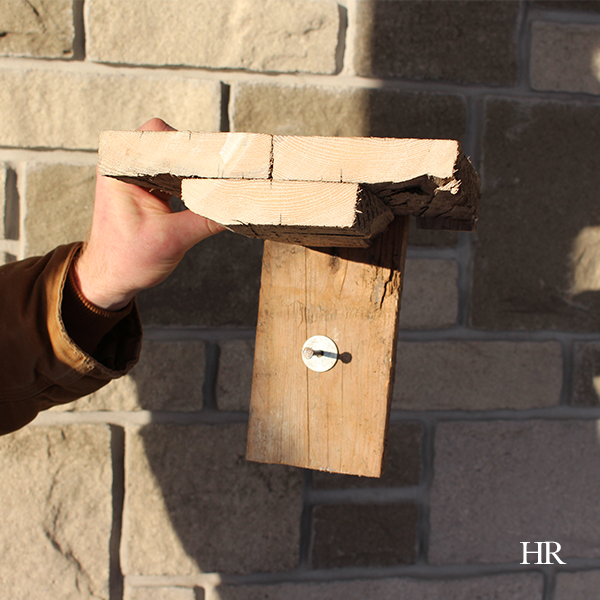
  • The platform should be approximately 8 inches squared, and depending on where you plan to install the nesting shelf, it may or may not need a roof (cover). Wes made one for me without a cover for under our covered porch, and one with a cover that’s on a more exposed side of the house.
  • Another key is that you don’t want to have any kind of barrier on the front of the nesting shelf.

april6_hopereflected_robin_shelf1

  • You’ll also want to be mindful that the nesting shelf is secured in a location where there is no way for cats or squirrels to climb up into the nest.
  • A good rule of thumb for where you’ll locate the nesting shelf, is to find a place close to your home that is between 7 feet tall and tree top height. It should be in a location that gets some sun, but also stays cool and dry.
    • Many people choose to secure a robin’s nesting shelf onto their home (rather than in a tree or on a fence) because predators like cats, squirrels, and even other birds (like Starlings or Crows) are less likely to get too close to your house. (You may have noticed in the past, that sometimes robins will choose to nest above a porch light or on top of a downspout, and this is why.)

april6_hopereflected_robin_nesting_shelf3

  • If your house is made with brick or stone, secure the nesting shelf with a tap-con or a concrete nail. Be sure to pre-drill to the appropriate size for that fastener. If your house is made with siding, before drilling, make sure you’re not compromising the house material or drilling into electrical/plumbing/etc.

april6_hopereflected_robin_nesting_shelf4

  • When the season is over, make sure to dispose of their old nest and clean the nesting shelf. Old nests have the potential to breed lice or mites. Besides this, next year, returning robins will build a fresh nest.
  • If you’re looking to make your nest shelf even more attractive, you could set out some berries or meal worms for the robins.

april6_hopereflected_robin_nesting_shelf5

Robins appearing are a sure sign of Spring. I hope you are able to take some time to get outdoors and appreciate the beauty of God’s creation during this season!

“The bird also has found a house, And the swallow a nest for herself, where she may lay her young…” {Psalm 84:3}

april6_hopereflected_robin1

Wednesday

16

July 2014

Hope, She Wrote: On Writing A Handwritten Letter

Written by , Posted in Christian Living, Hope's How-To, Published Work

july16_hopeshewrote_letter

I’ve written on the art of handwritten notes before, however this week’s column is inspired by some of the sweet snail mail I’ve received so far in 2014 from friends across the globe and even close to home. I hope it inspires you to pick up a pen and paper, and write to someone who’s on your mind today.

P.S. Am I the only who preferred Jane Austen’s Persuasion to Pride and Prejudice?

Who doesn’t love, – upon opening their mailbox, – receiving an envelope with their name handwritten on the front. I’m not referring to bills, or information, I’m talking about receiving a letter or a card from a friend. Doesn’t receiving a handwritten letter of some kind make you smile?

They’ve been around for ages, though as we move toward a more digital society, handwritten letters seem to be on the decline. There are several things in the world that have seen great progress, but ironically there’s one area where we seem to be regressing rather than moving forward – the art of personal communication.

The exception being few, people no longer favour writing lengthy love letters or handwritten thank-you cards. It’s all BBM or texting (or whatever the kids are doing these days). It seems we’ve become such slaves to technology that we’re too lazy to write long-form. (And don’t even get me started on the removal of cursive writing from school curriculum.)

Some of the best examples of handwritten letters can be found in classic literature. Darcy wrote to Elizabeth, a long dissertation narrating everything they’d ever been through together, to prove to her that his intentions were true and that he wasn’t a total jerk (I paraphrase, but you get the point). Perhaps even more powerful and poignant than Pride and Prejudice is the letter that appears in Austen’s Persuasion, when Wentworth professes his love to Anne for a second time (even though she’d brutally rejected him years earlier) in an attempt to win her heart once and for all. (For the record, may it be noted that on both occasions, things worked out in favour of these famous literary couples.)

The power of the handwritten letter isn’t just limited to classic literature, either. In real life, handwritten letters can have incredible impact. Think of the words shared between Kennedy and Khrushchev during the Cuban Missile Crisis, or the letters that author Agatha Christie sent to her family and friends during an around-the-world tour that reveal both adventure and heart-ache in the life of a fiercely private woman.

There is something that can be so striking and impactful about the handwritten word. With this in mind, here’s a challenge for this week, should you choose to accept it: Write a letter or a thank-you card to someone you care about. It doesn’t have to be long-winded; just be sincere and be real. Too often I think we take for granted the people who surround and who support us. So why not show some heart?

Here are some tips on how to write a handwritten note:

  1. Decide what you want to say. Thank you? I love you? You’re awesome?

  2. Pick up a pen, paper, and put down your thoughts. It doesn’t have to be complicated.

  3. To start, keep it brief. Keep your note to the point – don’t overthink it. By keeping it simple, you’ll feel more inspired to write again.

  4. Salutations and closings are key. A safe salutation is your recipient’s name followed by a comma. For a closing, be true to what’s on your heart. Jane Austen closed much of her correspondence with, “Yours affec’y” (yours affectionately).

  5. Put the note in the mail. Seems like a no-brainer, but this one is huge. You can always drop a card off to someone’s house or place of work, but send your note in the mail for optimal impact. There’s a feeling unmatched to that of pulling your mail of your mailbox and seeing a stamped letter addressed to you.

Robertson, Hope. “On Writing a Handwritten Letter.” Minto Express 16 July 2014: 5. Print.