Hope Reflected

Encouragement and Hope from God's Word

Hope’s How-To Archive

Tuesday

19

September 2017

Hope’s How-To | Dry Lay Stone Border

Written by , Posted in Gardening, Hope's How-To

Several of you have asked why we haven’t shared any photos of what we’ve been working on in our garden and yard so far this year. Well, friends, it’s been a full summer! Wes and I have both commented to each other several times that we feel that we’ve hardly had any time to be at home this summer and just… be. Anyone else with us?!

How to build a stone border | See our latest garden stone border at hopereflected.com

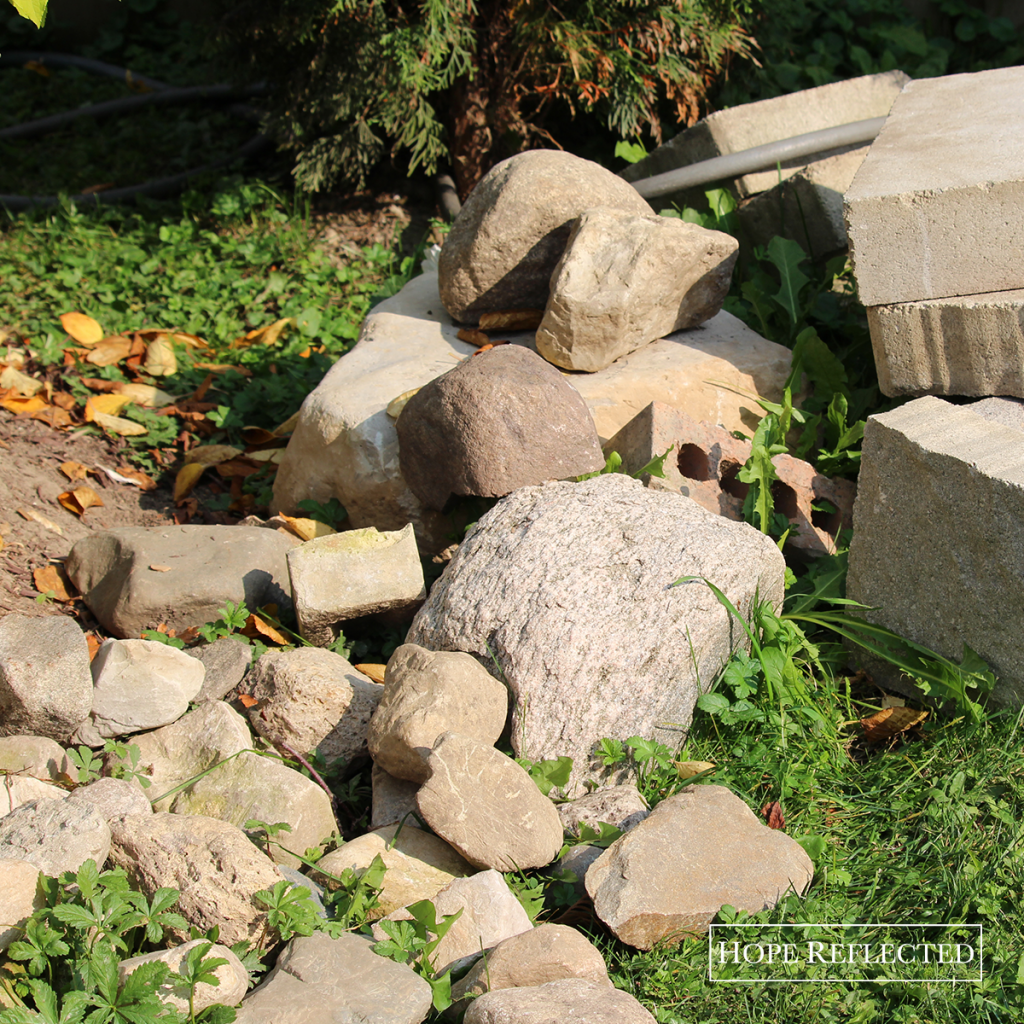
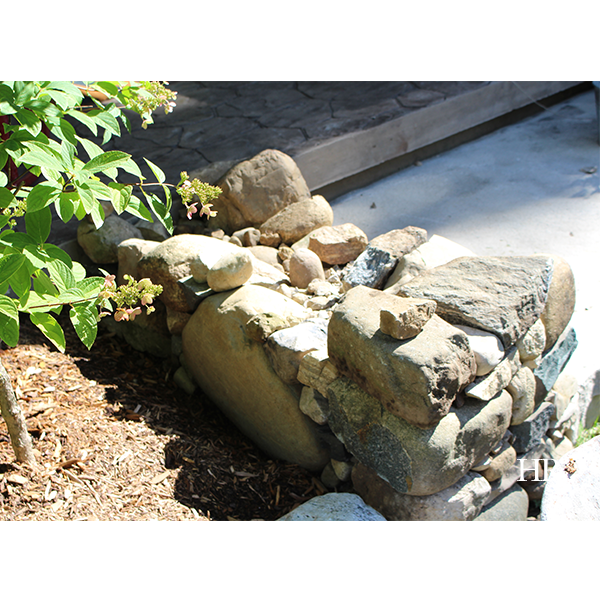
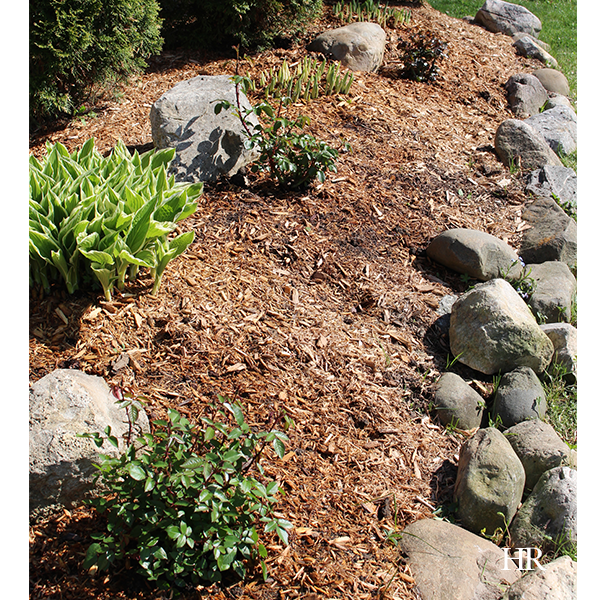
This past weekend, we were able to enjoy a brief respite from the world and spend some time outside in the garden and yard. Wes was able to get started on the next stone border in our garden, and I must say, it’s looking so beautiful I just had to share some pictures. Check out the “before” photo below.

Our latest garden stone border is on the blog! | See more at hopereflected.com

If you’ve been following along with our blog, you’ve already seen photos of the garden stone border that Wes completed last summer. Well, this summer, between concentrating on our hedge and planting more cedars, we’ve had little time to dedicate to finishing the dry lay stone border on the south side of our garden.

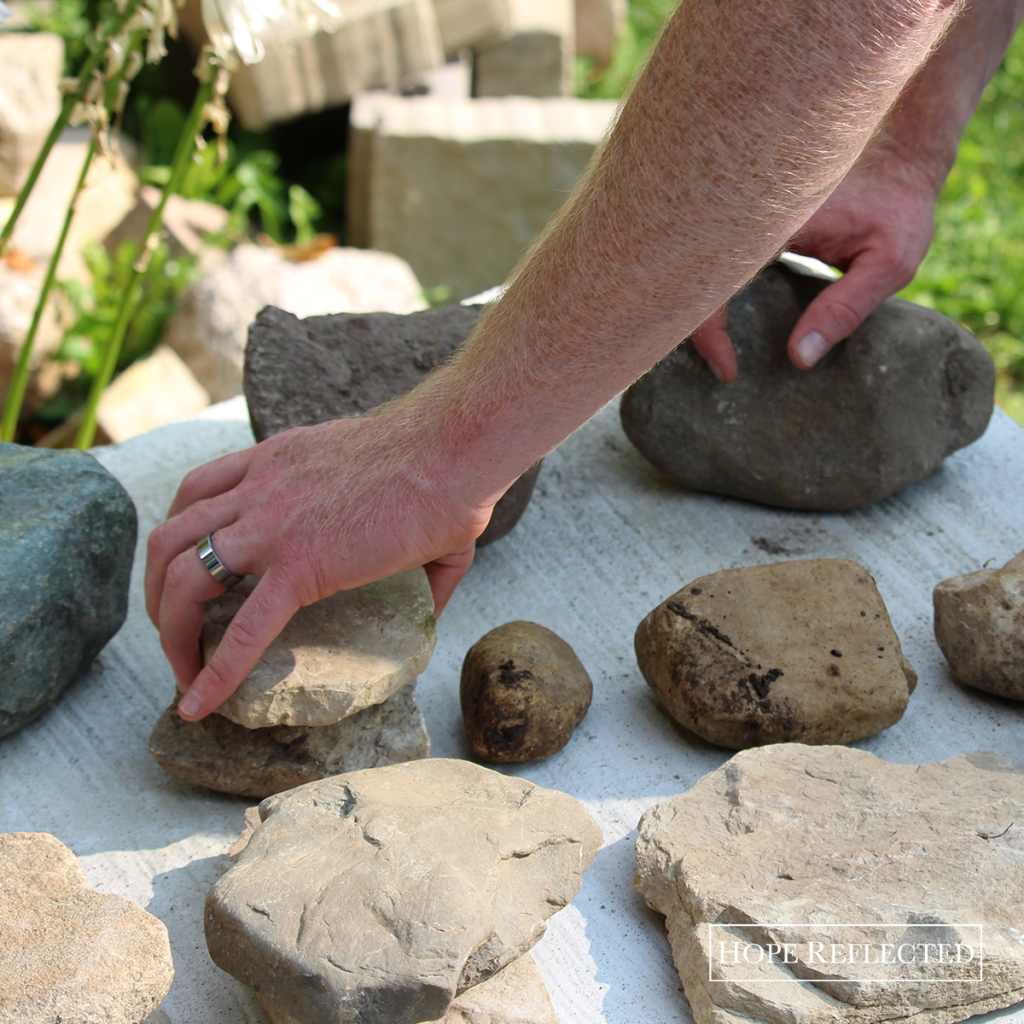
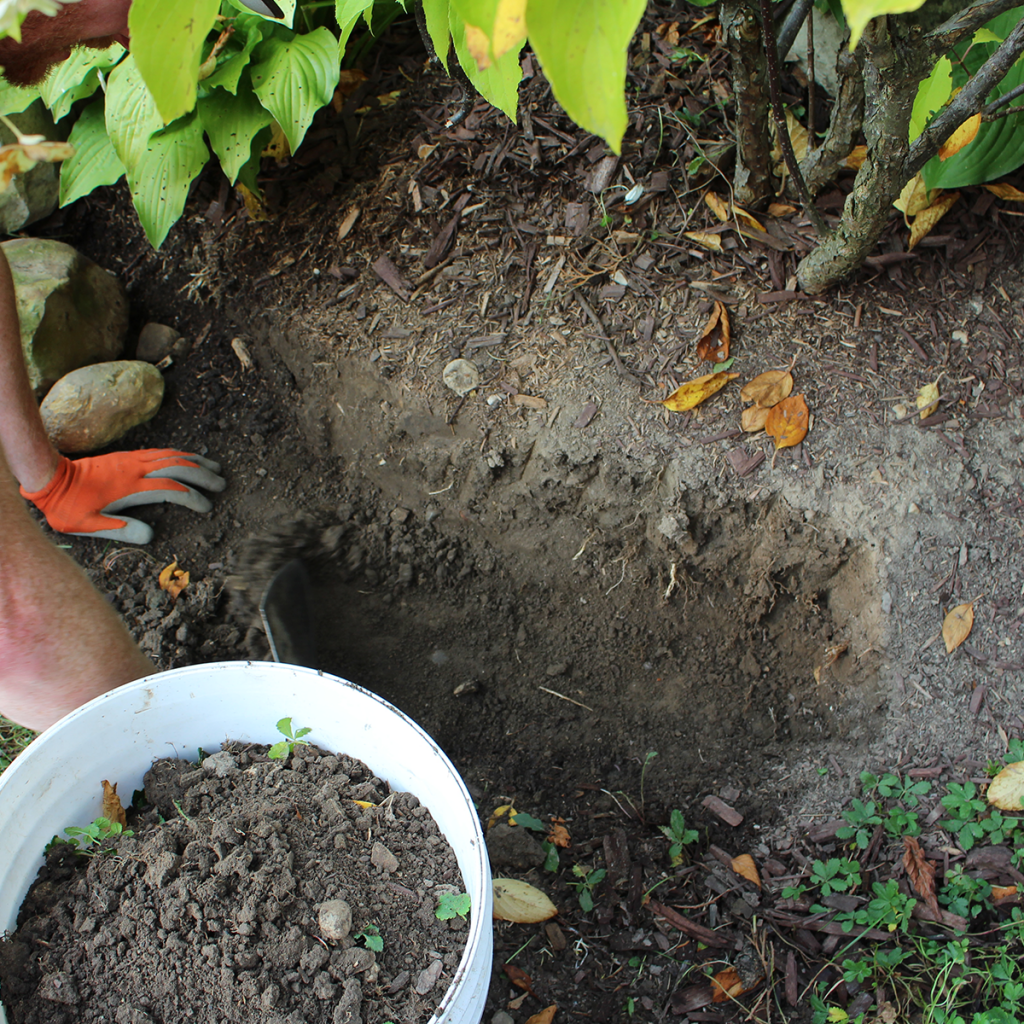
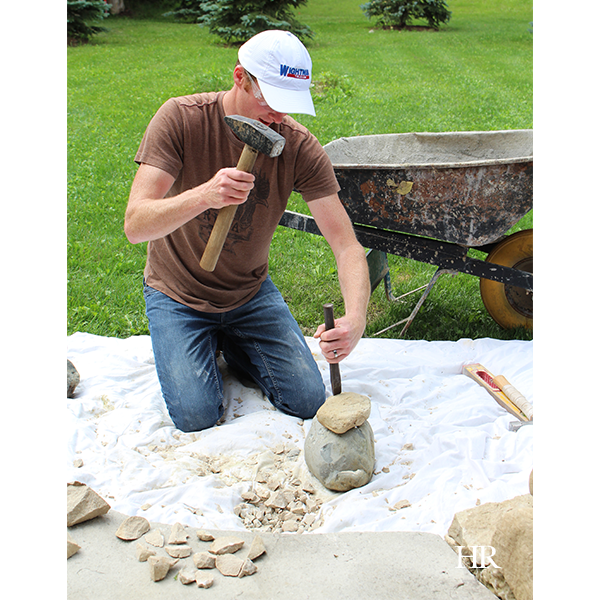
This past weekend, Wes went to work sorting stones and carving out the foundation for our latest dry lay stone border around the garden.

Our latest garden stone border is on the blog! | See more at hopereflected.com

Our latest garden stone border is on the blog! | See more at hopereflected.com

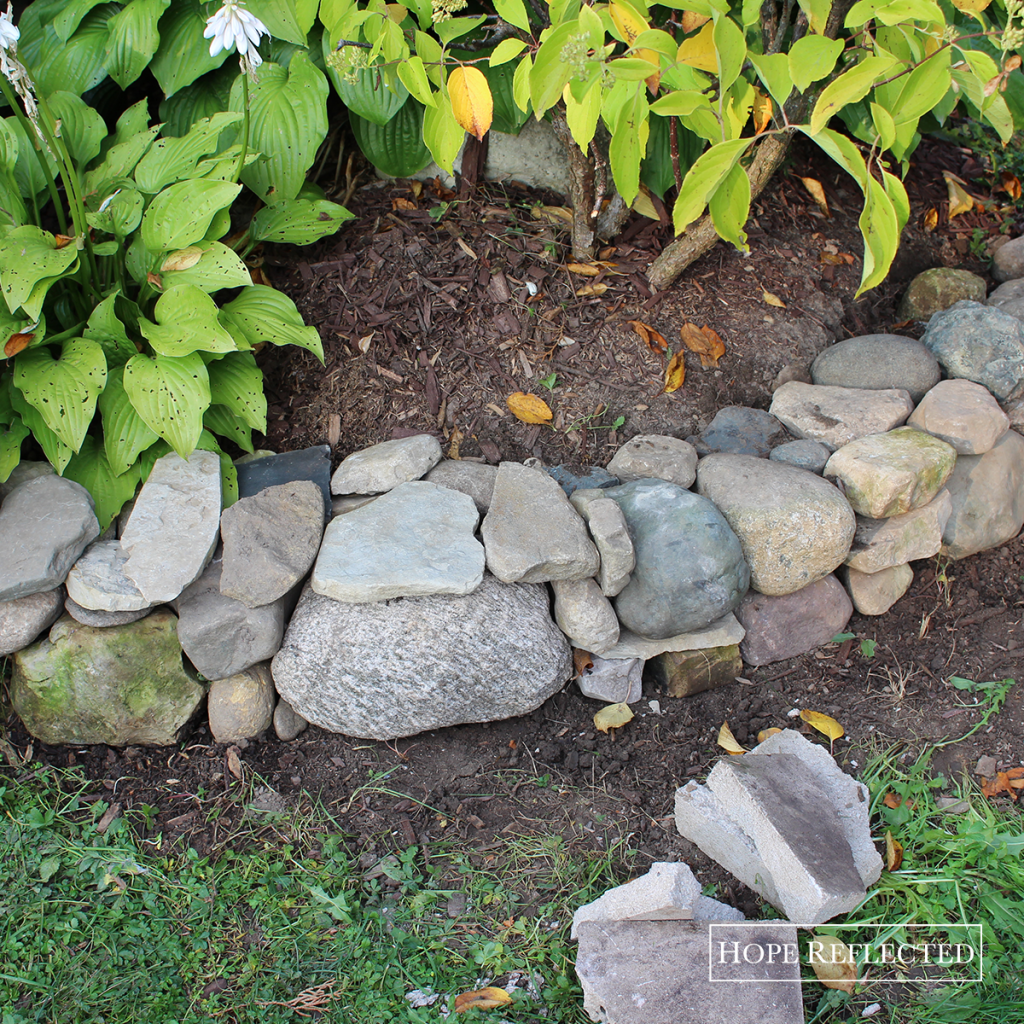
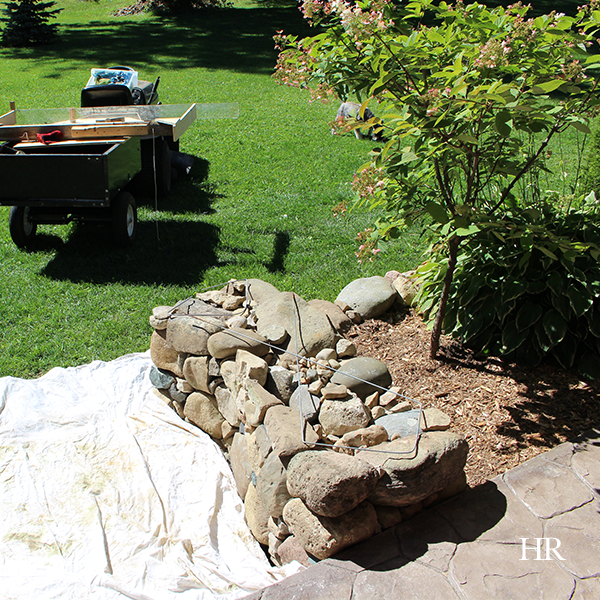
Wes started by cutting back the dirt bank about 10 inches to accommodate for the dry lay stone border. He dug out at an angle so there was positive slope towards the flower bed, which ensures that the stone actually sits into the bed rather than leaning out from the flower bed.

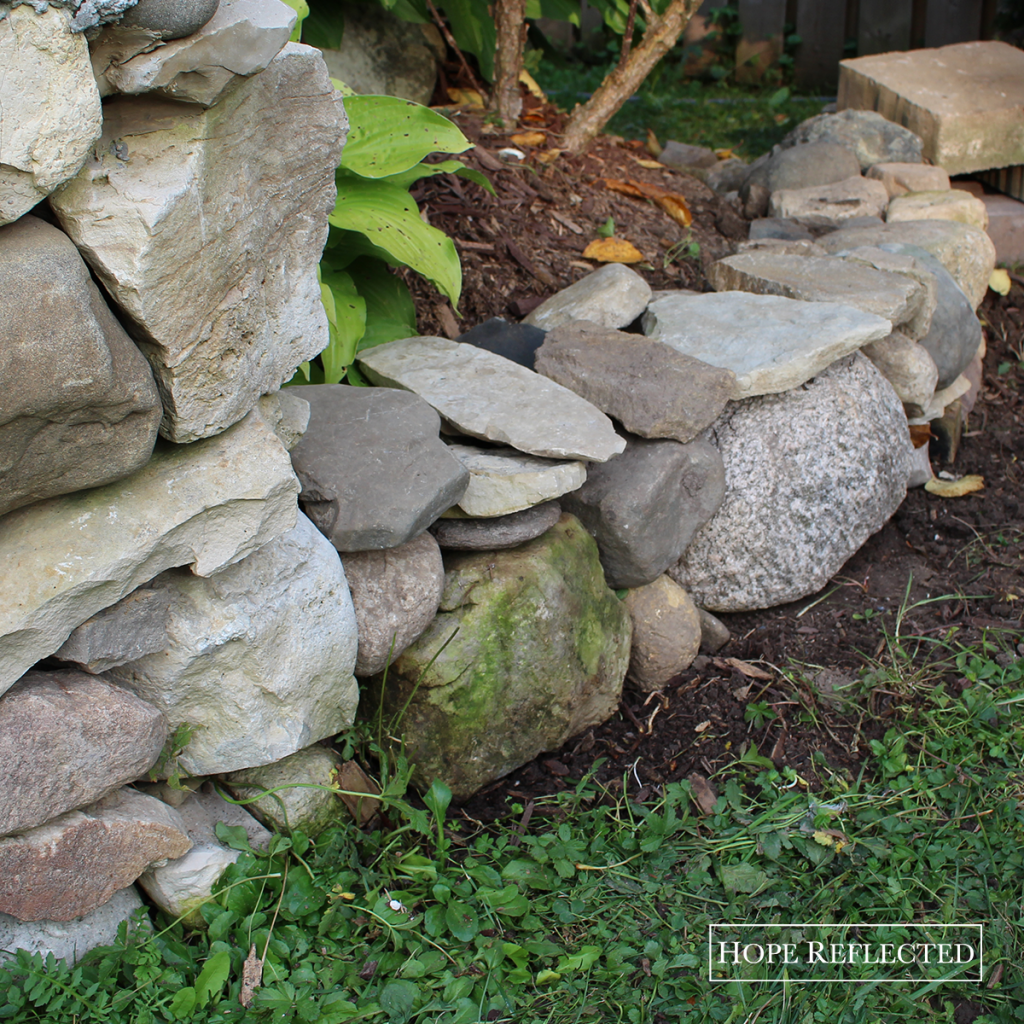
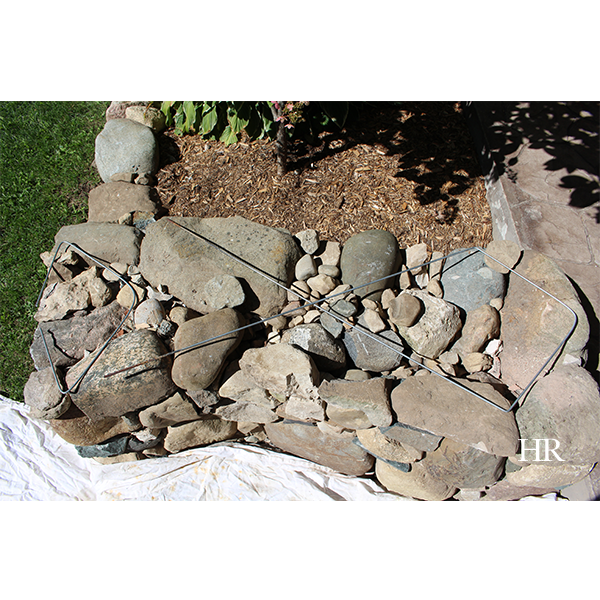
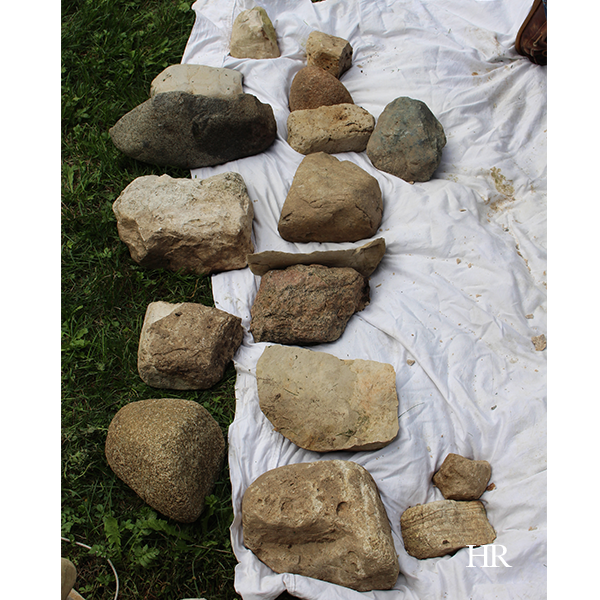
He placed the larger stones after taking a full inventory of the stones he had to work with (see photo above), and went to great lengths to place them evenly throughout the border wall. There was definitely some trial and error involved with creating the dry lay stone border. As Wes noted, the nice thing about this kind of application is that it does not have to be permanent; stones can be adjusted and moved if you get looking at them and feel you don’t that you don’t like the placement. In fact, areas can be entirely dismantled and reassembled to your liking. That’s the beauty of creating a dry lay stone bench or stone border for your garden! Wes says to think of the stones that you already have in your possession as pieces to your puzzle. There will be stones that sit better together; you just have to take the time to find them and to make the pieces work.

Our latest garden stone border. | See more at hopereflected.com

Our latest garden stone border. | See more at hopereflected.com

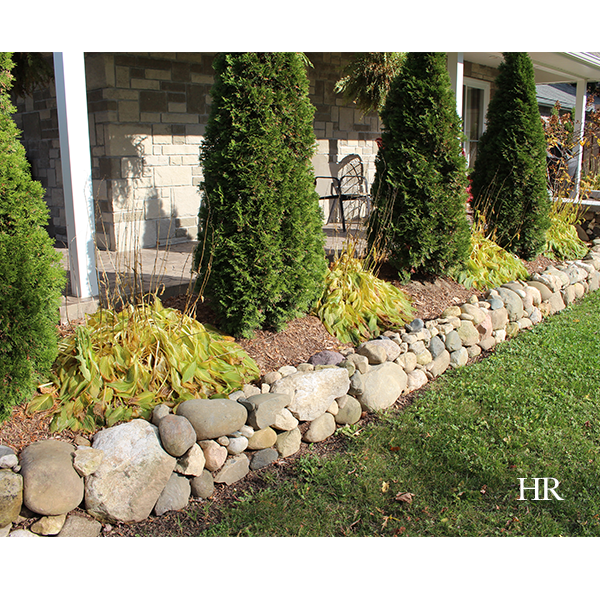
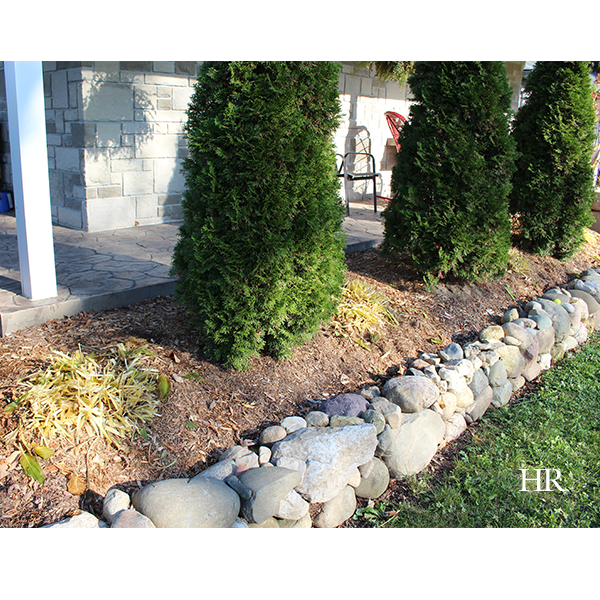
For us, this latest garden stone border project already makes a beautiful addition to our yard. Our latest border helps balance out the rest of the border around the garden. I love how Wes placed some of the larger stones evenly throughout the first level, and how he was so careful with the colour placement of the stones as well. I can’t wait to see the finished product!

Check out more photos of our DIY stone projects, stone garden benches, and stone borders and let us know what you think!


Tuesday

2

May 2017

Hope’s How-To: The Robins Are Back

Written by , Posted in Gardening

hope's how-to: Robins are nesting

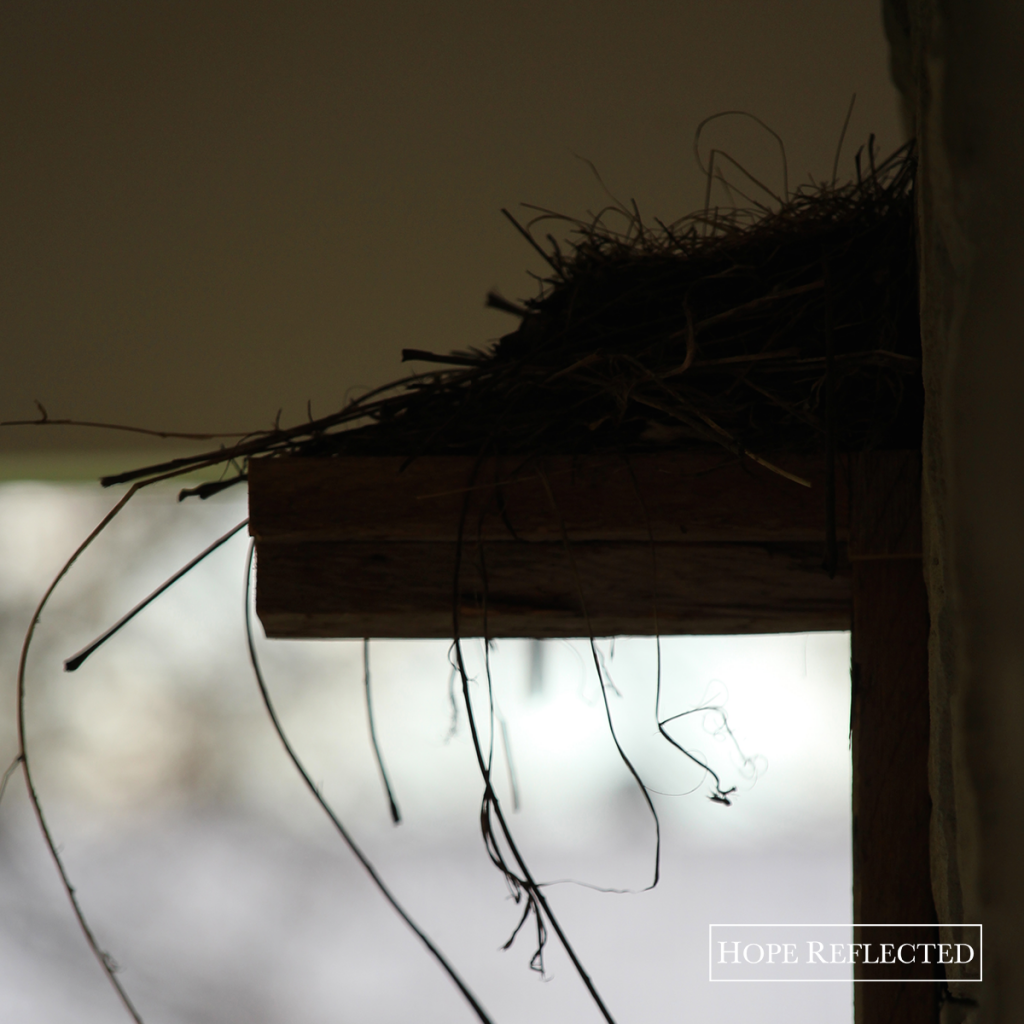
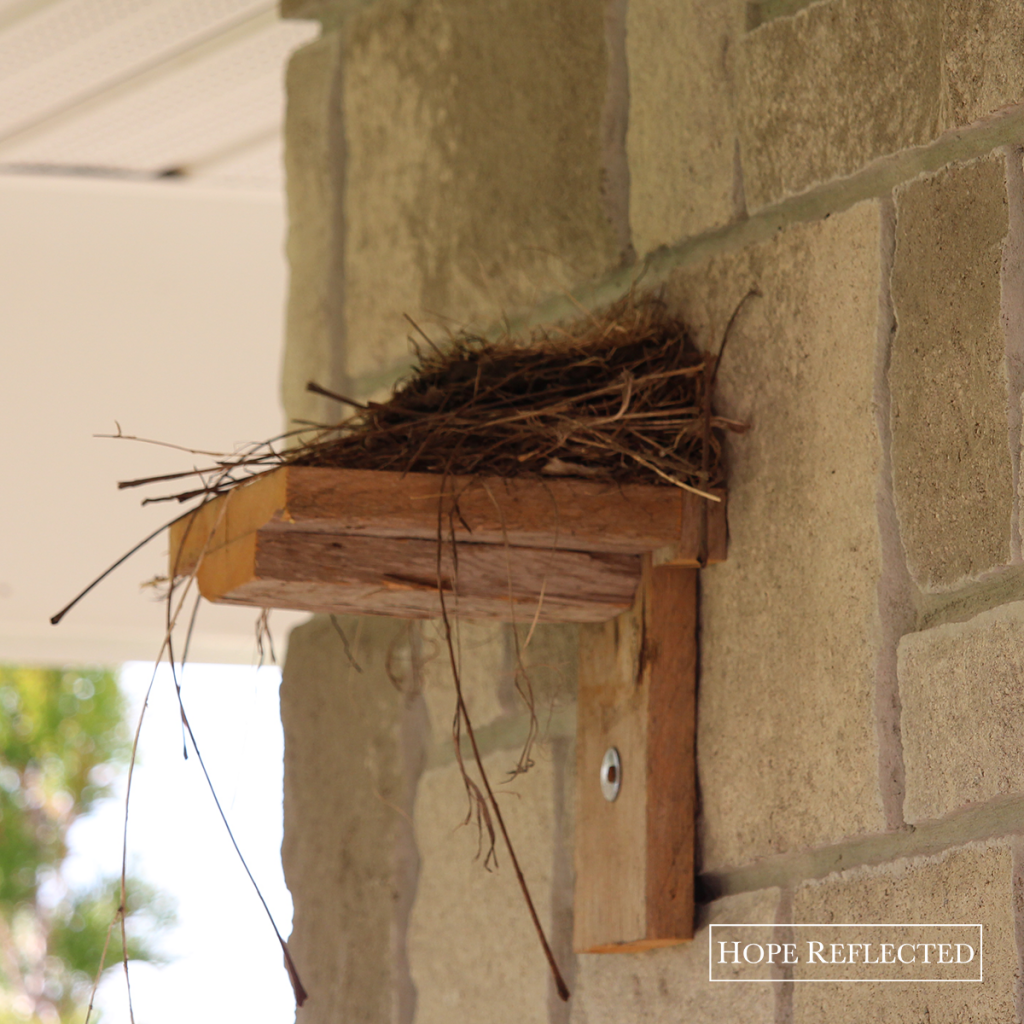
If you were following along on the blog last year, you read all about the family of robins that nested on the nesting shelf that Wes built me. Well friends, the robins are back! Wes and I were so excited to see on Saturday night that the robins have officially built their nest on our nesting shelf, and we are so looking forward to seeing another robin family grow and take flight right in our own yard.
A bit of back story for you: At the beginning of April, I noticed that there were some twigs on our nesting shelf. I knew these had to be recent, as after our robin family flew the coup last year, Wes and I disposed of the old nest and sprayed down the nesting shelf. I noticed one day that there were grackles up on top of the shelf. Concerned, and thinking that perhaps it was grackles and not robins using our shelf, I cleared off the shelf once again.

Three full weeks passed, and I waited patiently for the robins to nest. Nothing. Then, last week, I asked Wes to spray off the shelf again (lest the scent of the grackles was deterring a robin family from nesting). He did, and what do you know — we checked on Saturday night and in a span of less than 8 hours — the robins had built a whole nest!
hope's how-to: robin's nesting shelf

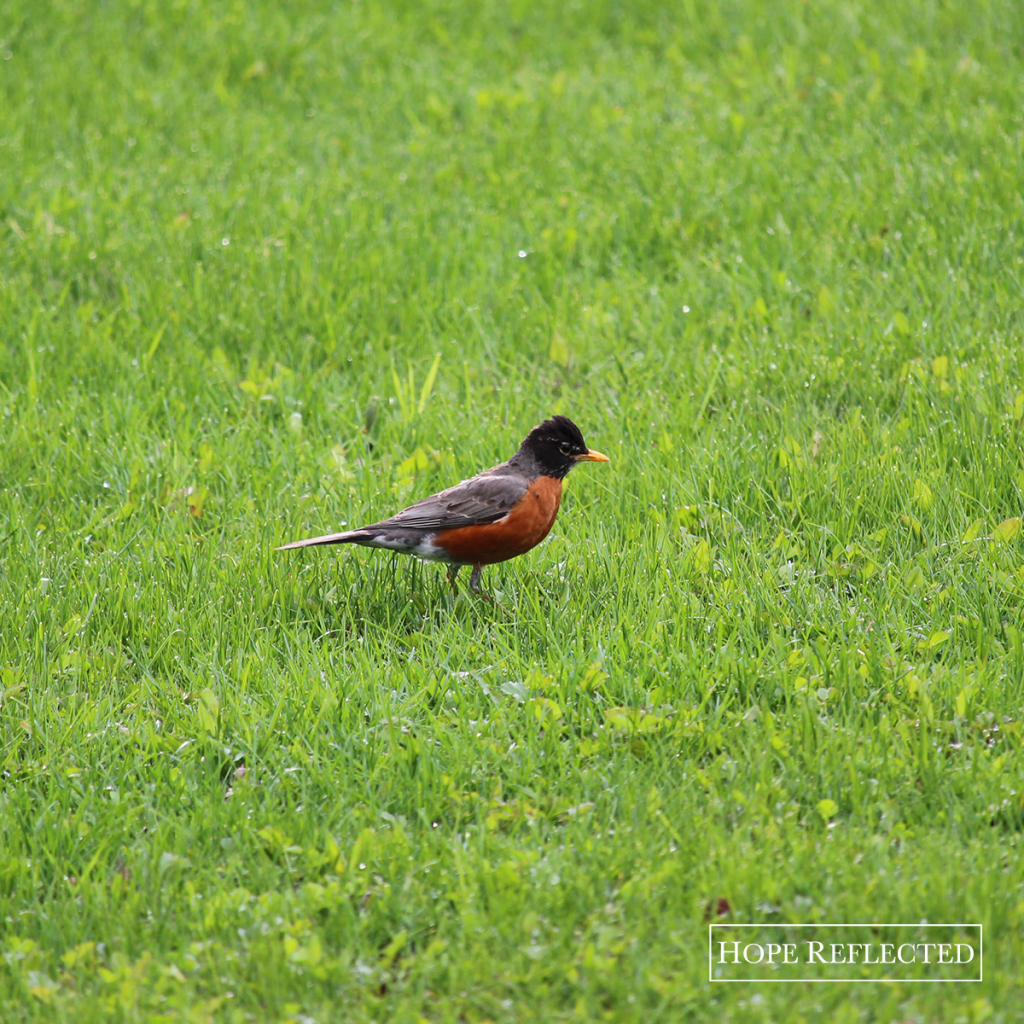
While it’s certainly not as neat as last year’s nest, it would appear that the robins are here to stay for the season. If you’re looking for ways to attract robins in your own yard, you should note that robins love blueberries (any berries, really). Also, if you’ve got a lawn that is more moist than dry (worms love moisture), you’re more likely to attract robins to your yard.

So far, it appears that our robins are making themselves at home. The robins have been busy around our yard, searching for worms, mating (I think?), and preparing to lay their eggs.

hope's how-to: robin's nesting shelf

Stay tuned for more photos as the season moves along. We are excited once again to be sharing the journey of the robin’s nesting shelf and robin family with you!

hope's how-to: robin's nesting shelf

For more on last year’s robins, click here.

Tuesday

15

November 2016

Gardening | How to Prepare Hostas for Winter

Written by , Posted in Gardening

This past weekend, Wes and I were finally (finally!) able to get out and complete some much-needed yard work in preparation for the cooler months ahead. Mainly, we (Wes) were able to clean up the blowing leaves, trim back the hostas, and trim back the peonies for winter.

how to prepare your hostas for winter

As you can see, we’ve got lots of hostas around our home. We love them; in the summer, hostas are one of the most easy, low-maintenance plants you can get. They require very little attention, and they look fantastic. All. Summer. Long. We’ve been fortunate this year in that our hostas looked good well into October. Each year, we take care to cut them back before the snow flies, and so far, our methodology of how to prepare our hostas for winter seems to work (each year they come back stronger).

how to prepare hostas for winter

If you’re wondering how to prepare hostas for winter, here are a few tips:

  1. Trim the hostas back after the first frost. Try to do this before the leaves of the hostas get too wet and start to rot. Using shears or scissors (I used scissors), cut the hostas back and remove the leaves. I usually leave a good 3 inches or so on the stem.
  2. Dispose of the old leaves. For some reason, hostas seem to be attractive to slugs and snails. By trimming back the leaves and properly disposing of them (don’t leave them laying in your garden), you remove any protection or ‘home’ for the slugs. I’ve also heard from several avid gardeners that leaving a small bowl of beer out in the garden around your hostas is a great way to rid the garden of slugs and snails.
  3. Make plans to divide your hostas. Typically, gardeners recommend dividing hostas every few years. I was extremely fortunate, as all our existing hostas were gifted by our generous neighbours. Our hostas are coming into year four, and Wes and I need to decide which varieties we’ll divide next Spring. Dividing hostas is best done in the Spring.

preparing hostas for winter

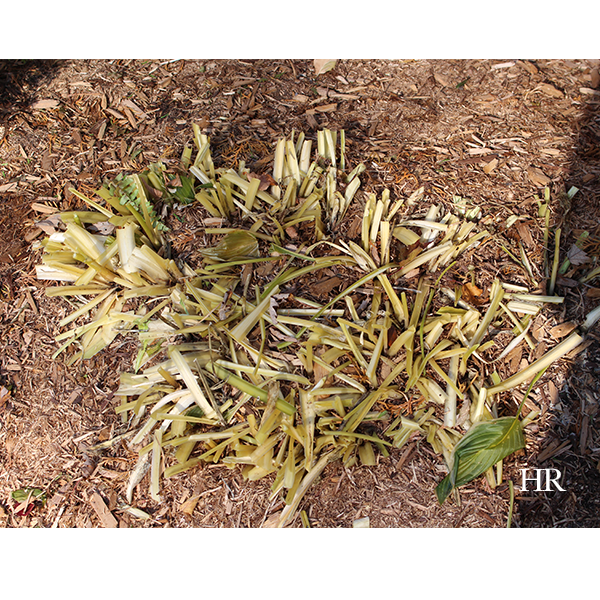
Some people may choose to cover their remaining hostas stems with mulch; I’ve read mixed reviews on this method of preparing your hostas winter. In the photo above, you can see how Wes and I leave our hostas for the winter. We don’t cover them with mulch, we don’t do anything other than trim them back and get rid of the old leaves, and so far we haven’t been disappointed.

Any other tips you use for preparing hostas for winter? I’m interested to know!

Tuesday

1

November 2016

Gardening: When to Plant Garlic

Written by , Posted in Gardening

when to plant garlic

Wondering when to plant garlic in your garden? While garlic can be planted in spring or fall, traditionally in our neck of the woods fall is the time to get those bulbs in the ground. We’ve had such a mild fall so far, which is great for those of us who are late getting our garlic in the ground!

when to plant garlic

If you take the time to plant garlic in the fall, typically before the first hard frost, you’ll see the greatest reward next summer, as bulbs planted in the fall tend to grow larger and with more flavour when harvested the following summer.

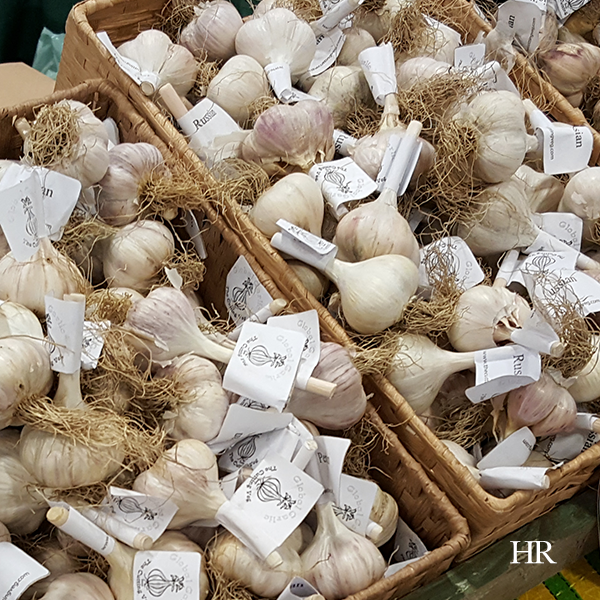
Back in September, Wes and I attended the Stratford Garlic Festival, and it was an incredible way to learn from local farmers about their best practices, what to do and what not to do when planting garlic, and also what different varieties of garlic mean for growing.

when to plant garlic

Here are some tips if you’re planting garlic in your garden this fall:

  • Break the garlic cloves apart before you put them in the ground (don’t peel the cloves before you plant them);
  • Plant your garlic about one month before the ground freezes for winter;
  • Garlic grows well in the sun, so keep this in mind when selecting a location in your garden;
  • Cloves can be placed 4 to 6 inches apart, and about 2 inches in the ground;
  • Plant your garlic cloves with the pointed end facing up. The root should face the earth.

More to come as Wes and I plant our garlic and get it growing!

when to plant garlic

Tuesday

18

October 2016

Gardening: Preparing Roses for Winter

Written by , Posted in Gardening

If you’ve been following along on the blog, you know that earlier this summer, Wes and I planted four different roses bushes in our front garden. Our roses this year have been a huge success, and now we’re getting ready for our first winter with these beautiful bushes!

Although we’re well into fall, our roses are still producing new blooms, and we want to make sure the roses are protected throughout the winter months.

Here are some helpful tips if you’ve got rose bushes of your own and are preparing roses for winter:

1. Keep roses watered. Fall usually brings with it plenty of rain (depending where you live), however it’s a good idea to continue to water your rose bushes and keep them hydrated. You can continue to water even after the first frost, but stop before the ground freezes for the season.

preparing roses for winter

2. Stop cutting the roses. Yes, it may be tempting, especially if you’re still seeing new growth, but in order to properly prepare roses for winter, you should stop cutting back your roses in early to mid-fall. This will allow the roses to form rose hips (rose seed pods). Done right, you can actually collect the seed pods to plant more roses for next season.

preparing roses for winter

3. Stop fertilizing roses before the first frost. Like watering, fertilizer is an essential tool for healthy roses during the warmer months, however you should stop fertilizing before the first frost. This will prevent growth from spreading too long into the fall season, and will encourage the roses to prepare for winter.

4. Protect the base of the rose bush. Cover the base of your rose bush with soil or mulch, to cover above the bud union. You’ll still have the stems (or canes) of the roses sticking out. Also take this opportunity to pull off any old leaves from the roses (leaves can contain disease, as you may have seen with one of our rose bushes this year). Rather than just covering the base of the rose bush, some people actually form a base (of mesh or plastic or another material) and fill it with soil or mulch.

5. Tie the stems (canes) together with string. Winter can be windy (and snowy!) so hold your rose bush together by tying the canes together with spring, and then in the spring cut back the old stems to promote new growth.

preparing roses for winter

Tuesday

27

September 2016

Hope’s How-To: Build a Dry Lay Stone Bench, Part 2

Written by , Posted in Gardening, Hope's How-To

Hope's how-to: Build your own dry lay stone bench

As you’ve read previously, Wes has completed two dry lay stone bench projects in our yard. In August, he started working on a third, just off our patio, and we’re finally getting around to posting more photos of the whole process. The photo above shows the dry lay bench when the yard-facing end was complete. Wes notes that if you’re building your own dry lay stone bench, it’s important to consider that each layer of the bench should be completed at the same time for structural strength.

dry lay stone bench

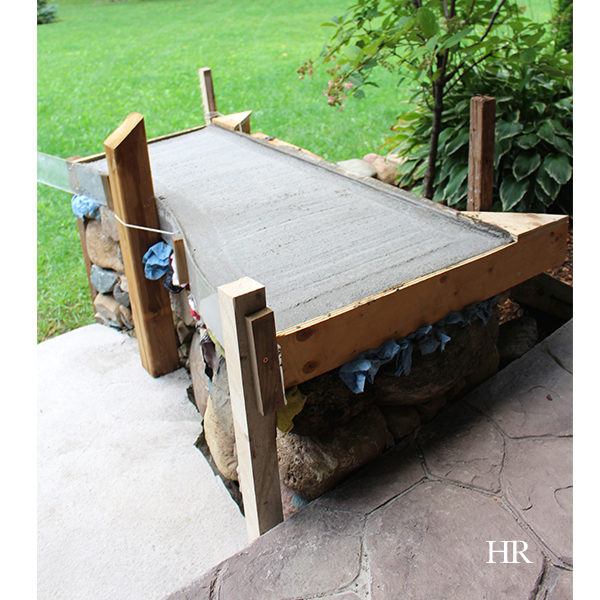
This is a photo from our patio vantage point, looking at the completed dry lay bench, just before Wes poured the concrete cap. Wes was very careful to maintain the angle of the bench, taking into consideration which way we want the water to run off the bench (away from our home and patio). During the building of the bench and pouring of the concrete cap, our patio stone was covered to prevent any staining or damage.

dry lay stone bench

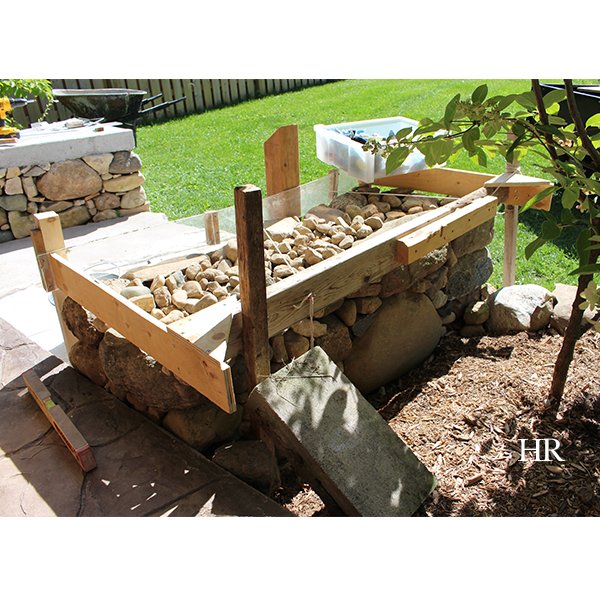
In preparation for pouring the concrete cap, Wes utilized some old wire from a sign in substitution for rebar and to reinforce the strength of the concrete cap. We debated whether we actually wanted to pour a cap on this bench, or just leave it as an entirely natural lay, and in the end we opted to pour a cap for a couple of reasons: 1. So the look of our patio would be symmetrical, and 2. A poured concrete cap = extra outdoor seating for entertaining in the summer months!

dry lay stone bench with form

It required a lot of patience to build the form for the concrete. Wes ensured the run off angles were accurate by using a level every step of the way. He also used string to pull in the plexiglass side of the form to create the curved side of the concrete cap. He made several adjustments along the way as setting up the form was tedious work.

dry lay stone bench

As you can see from the photo above, Wes used plexiglass for the one side of the form as we wanted to create a curved side that runs parallel with the natural shape of our patio stone. If you’re planning a project like this on your own property, we’d recommend ensuring that for your concrete cap you use the right ratio of water to cement. Add the water slowly to your mix. After the concrete cap was poured, Wes used a broom to create the brushed effect in the centre of the concrete, and used an edger to create the finished border.

Stay tuned for more pics of the finished product and our patio!


Tuesday

30

August 2016

Hope’s How-To: Build a Dry Lay Stone Bench

Written by , Posted in Gardening, Hope's How-To

We’ve had several compliments and questions regarding Wes’s masonry style when it comes to the dry lay stone benches he has been creating in our yard. He’s working on the third bench now to round out the project, and I can’t wait until it’s complete!

dry lay stone bench before

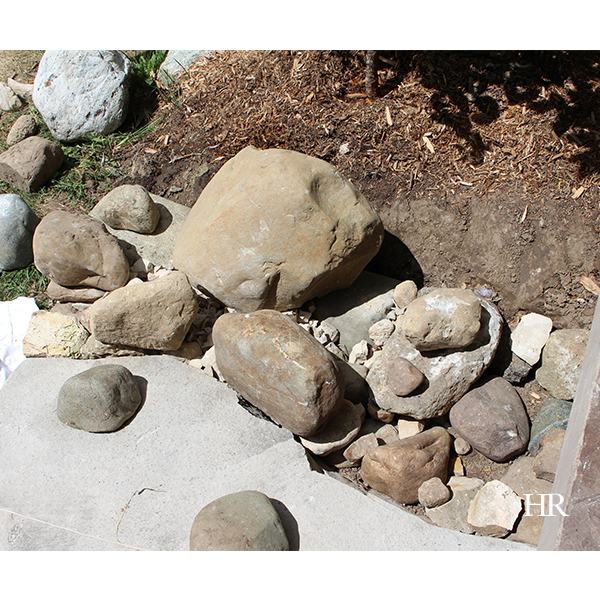
The above photo is before things really got started on the dry lay stone bench. Previously, we had a pile of large stones between the garden and slab stone step off our patio. To get the ground ready, Wes raked and levelled out the earth, and put down some gravel.

dry lay stone bench after

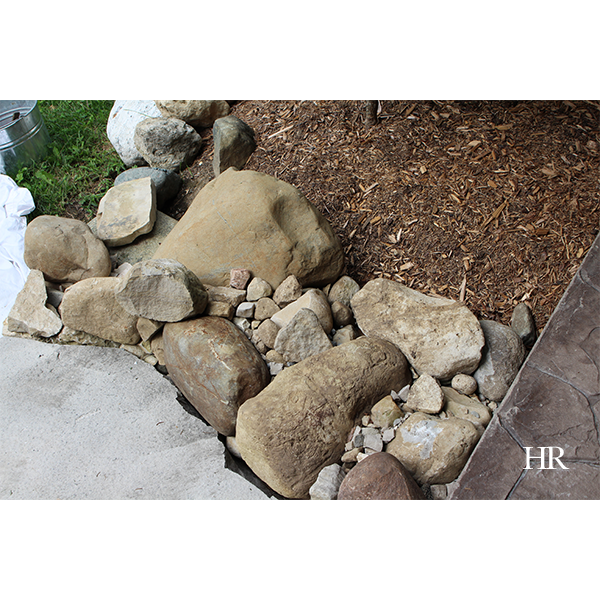
If you’re looking to create a DIY dry lay stone bench of your own, you will want to choose the stones for your bench based on their function in the wall system. In the above photo, you can see how Wes has carefully selected larger anchor stones for around the border of the stone bench, and used smaller, filler stones for the centre of the bench.

my husband cutting stones

Choose a stone according to its density. For example, if your DIY bench requires custom stone cutting, ala the photo above, you’ll want to choose limestone to work with it because it cuts more easily than other rock varieties. As you can see above, Wes is cutting a piece of limestone against a blue metamorphic rock (which is extremely dense and does not break easily).

choose rocks for your stone bench

Wes highly recommends laying stones out so you can see them before you get started with your stone bench project. Having a full view of the rocks available for your DIY will greatly assist you as you compose your stone bench. This practice also allows greater ease in experimenting with which stones will work best for the space in which you’re building.

For more advice and photos on how to build your own dry lay stone bench, check out our other completed DIY stone bench projects here, here, and here.

Tuesday

2

August 2016

Roses: Rosa Hybrid Singin’ In the Rain Floribunda Rose

Written by , Posted in Gardening

A couple of weeks ago, I shared the first photos of the Bolero Floribunda Rose bush that Wes and I planted. Today, we’re sharing photos of our Singin’ in the Rain Floribunda Rose, one of three rose varieties that we planted in our front garden this Spring.

singin' in the rain floribunda rose

New bloom on our Singin’ in the Rain Floribunda Rose

On the receiving end of 6+ hours of sunlight each day, our front garden is the ideal spot for roses. Wes and I have been very impressed so far with the performance of our rose bushes so far this year. We water the roses regularly, and we’ve also been using a rose fertilizer every 10-14 days.

singin' in the rain floribunda rose

Our Singin’ in the Rain Floribunda Rose bush after we first fertilized

We got a few blooms right in the beginning, and then we trimmed the bush back. After fertilizing the first time, we saw thirteen more blooms, which we’ve since pruned back (and we’re now seeing more blooms). The Singin’ in the Rain Floribunda Rose is a brilliant copper-apricot peach coloured flower on a deep green leaf.

Singin' in the Rain Floribunda Rose

The brilliant peach-coloured blossoms of the Singin’ in the Rain Floribunda Rose

Admittedly, Wes and I have had some struggles with two of our rose bushes this year. Our Singin’ in the Rain Floribunda Rose and our Ten-Ten Hybrid Tea Rose have been plagued with sawfly larvae (more on that later). After treating the bushes and trimming them back, the new blooms appear unaffected.

singin' in the rain floribunda roses

Trimming back our Singin’ in the Rain roses after they were attacked by rose sawfly larvae.

Growing up to 6 feet tall and 4 feet wide, many people choose to use Singin’ in the Rain Roses as part of a plant hedge, by planting multiples of the rose bush in one place. Roses in general are also a great plant choice if you’re looking to attract bees to your garden.

Singin' in the Rain Floribunda Roses

Our Singin’ in the Rain Floribunda Roses after fertilizing.

You can see in the above photo how the hue of apricot/peach deepens with each new bloom. Older blooms are apt to be lighter in colour. The Singin’ in the Rain Floribunda Rose is an excellent specimen if you’re looking to trim and enjoy the cut flowers inside. Just beware that this specimen of roses has a thick spine and thorns.

Singin' in the Rain Floribunda Roses

We’ve been enjoying our Singin’ in the Rain Floribunda Roses this year!

If you’re looking to plant rose bushes in your yard, we’d recommend you choose to plant them in the Spring, in an area of your yard that receives lots of sunlight. Also, watering and regular fertilization is key. Wes and I have been using Miracle Gro, however there are other rose fertilizers on the market with good reviews. We are enjoying this particular rose variety, and look forward to many more blooms even before the end of this season!

Tuesday

12

July 2016

Roses: Rosa Hybrid Bolero Floribunda Rose

Written by , Posted in Gardening

roses bolero floribunda rose

Our rose bushes after we first planted.

It’s no secret that I’ve always had a soft spot for roses. This Spring, Wes suggested that we plant some of our own rose bushes to grow some blooms at home. We picked out three varieties — the Bolero Floribunda Rose, the Ten-Ten Hybrid Tea Rose, and the ‘Singin’ in the Rain’ Floribunda Rose — and we planted them in our front garden.

roses bolero floribunda rose

First bloom of our Bolero Floribunda Rose.

We chose our front garden as it gets the majority of sun (6+ hours each day), which is a requirement for successfully growing any plant in the rose family. Most roses do well with lots of sunlight, as well as regular watering.

roses bolero floribunda rose

First blooms from our Bolero Floribunda Roses!

Bolero Floridbunda roses are usually 2-3 inch blooms with seemingly endless layers of petals and a unique fragrance. Their full petals resemble a small peony, and their foliage is typically a very rich green.

roses bolero floribunda rose

Bolero Floribunda Rose

Originally from France (now grown all over, and in Canada), Bolero Floribunda roses are known to be one of the more disease-resistance varieties of roses. Spoken from experience, our Bolero Floribunda roses were the first bush to bloom of the three that we planted in our front garden.

roses bolero floribunda rose

13 blooms at the peak of the Bolero Floribunda Rose.

The blooms have come and gone for this season, and Wes and I have pruned them back. We fertilize every other week, and we’re already starting to see new growth!

roses bolero floribunda rose

Lots of layers in the blooms of the Bolero Floribunda Rose.

Friday

24

June 2016

Hope Reflected: 3 Reasons to Start Doing Devotions – Devotions in the Christian Faith

Written by , Posted in Christian Living, Published Work

devotions

Charles Stanley once said that “a lack of joy in a Christian’s life often can be traced to a lack of concentrated devotional time in God’s Word.”

You’ve heard the adage, “six pack abs start in the kitchen,” and that’s true. So much of our overall physical health depends just as much (or more!) on what we eat than it does on how much physical exercise we get. The same can be said of our spiritual health. The condition of our spiritual life depends just as much or more on the time we spend in God’s Word, – the Bible, – and how much time we spend meditating on Him, than it does on how much time we spend trying to encourage others and think positive.

Devotional time. What are devotions in the Christian faith? By definition, devotion is “love, loyalty, or enthusiasm for a person, activity, or cause.” Having a time of devotion or doing devotions is, in its simplest form, when you set aside time each day to get into the Bible to learn about God, and focus on Him. Devotions usually involve a reading from the Old Testament, New Testament, as well as the Psalms and Proverbs. Devotions typically focus on improving and growing our knowledge of the Lord and our relationship with Him, and most include a time of prayer.

Devotions are important to the Christian faith for several reasons, and here are three areas that devotions have especially impacted my life:

  1. Devotions help get my heart in the right place. As the Psalmist David said in Psalm 139:23-24 (KJV), “Search me, O God, and know my heart: try me, and know my thoughts: And see if there be any wicked way in me, and lead me in the way everlasting.” A successful relationship is not a one-way street. A relationship with God isn’t just me trusting in Him so nothing bad will ever happen or because I think it will benefit me. As a Christian, I have to pursue Him; I have to approach Him in reflection and with an open heart so that I can hear what God’s trying to teach me through His Word.
  2. Devotions help me slow down. Psalm 46:10 (KJV) says, “Be still, and know that I am God;” I can’t be still unless I take the time to slow down. Being still is a big part of a successful devotional time. Too often I find that if I’m in a rush or thinking ahead about everything that I have to accomplish today, my devotional time won’t be as meaningful and I won’t get as much out of it. Take time to really slow down; take time to “lie down in green pastures” (Psalm 23:2).
  3. Devotions help me grow by highlighting areas in my life that need correction. Psalm 26:2 (KJV) says, “Examine me, O LORD, and prove me; try my reins and my heart.” Only God truly knows the intention of each heart, and asking Him to examine my heart helps me to keep things real and reveals that I am in desperate need of His help in every area of life. Proverbs 21:2 (KJV) says that “Every way of a man is right in his own eyes: but the Lord pondereth the hearts.

If you’re looking to start a devotional time each day, a great place to begin is in the Psalms or Proverbs. There’s so much wisdom even just in these two books. There are 31 Proverbs, which is fitting to each day of the month, so you could choose to start today and read one Proverb each day throughout the month. A similar practice can be done with the Psalms. However you decide to do your devotions, the important part is getting started – God will speak to your heart if you’re open to hearing Him and what He has to say through His Word!


Originally published as “3 Reasons to Start Doing Devotions – Devotions in the Christian Life.” Minto Express. June 15, 2016: 5. Print.